
Want to decorate your home with the beautiful pumpkins you see in the expensive catalogs? But don’t want to pay the high fees they charge? Make some faux terra-cotta pumpkins with my Pottery Barn Pumpkin dupes tutorial. I love how they turned out and they are so easy to make.
POTTERY BARN TERRA-COTTA PUMPKIN DUPE
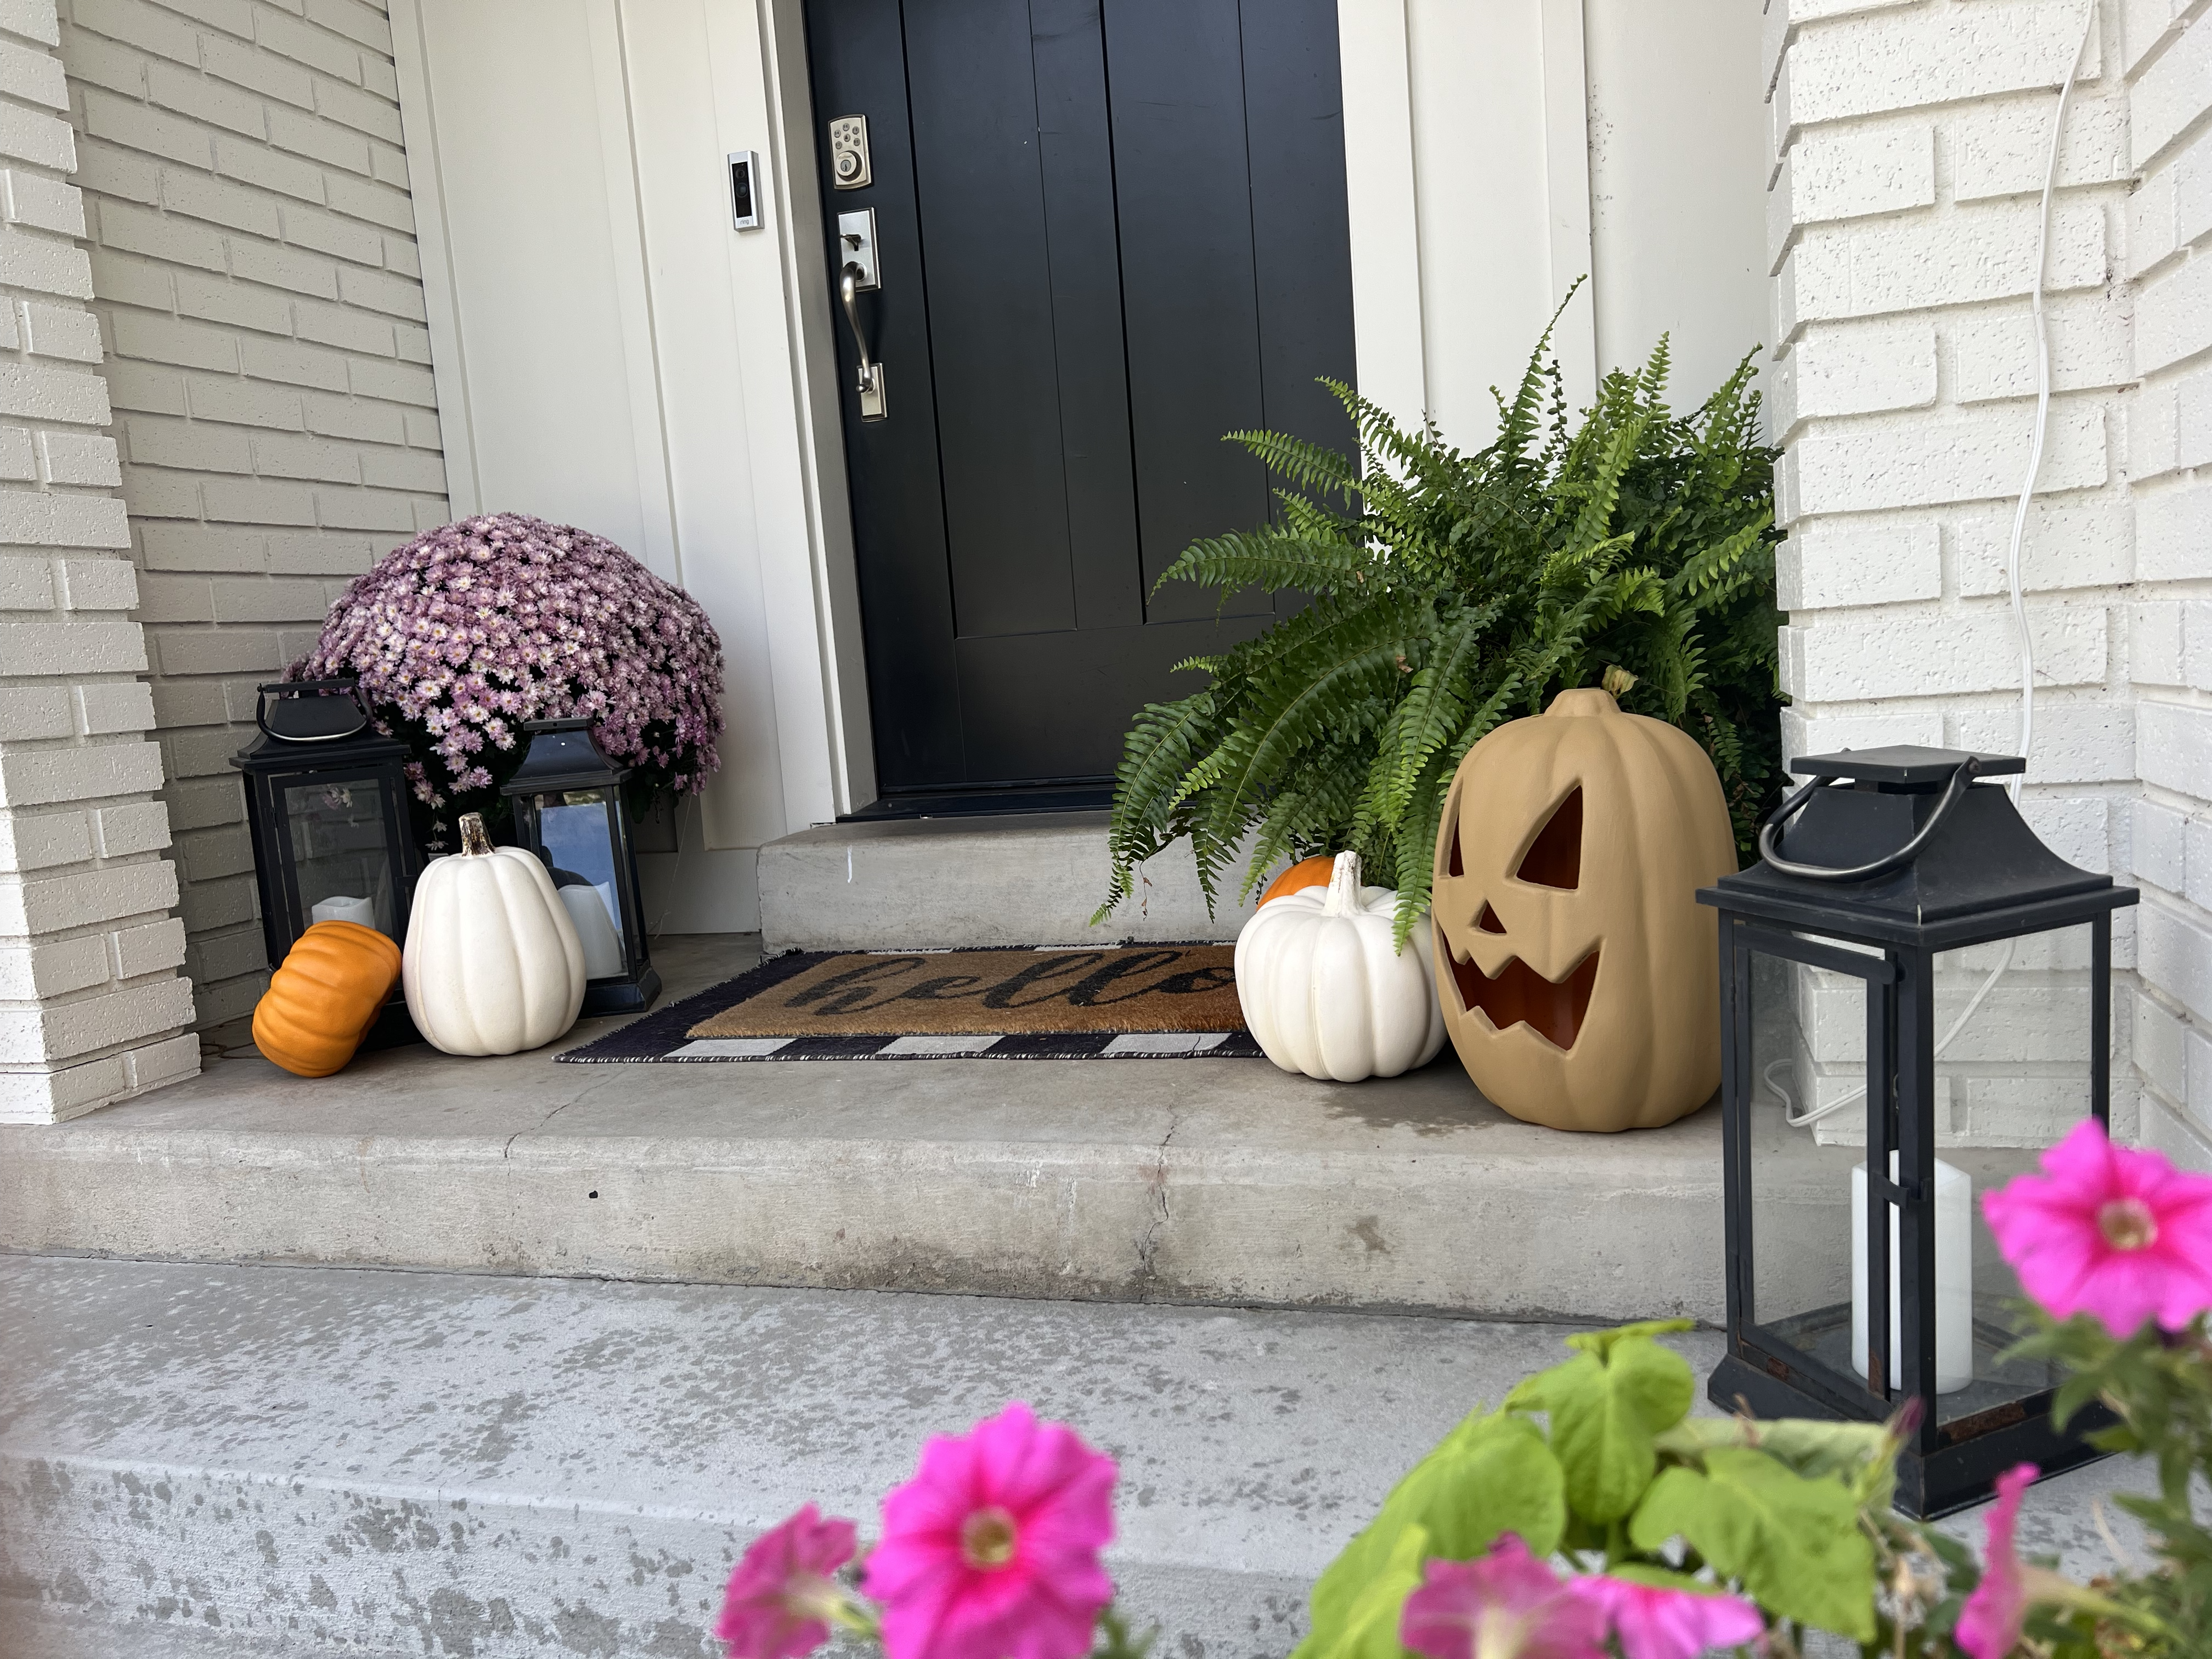
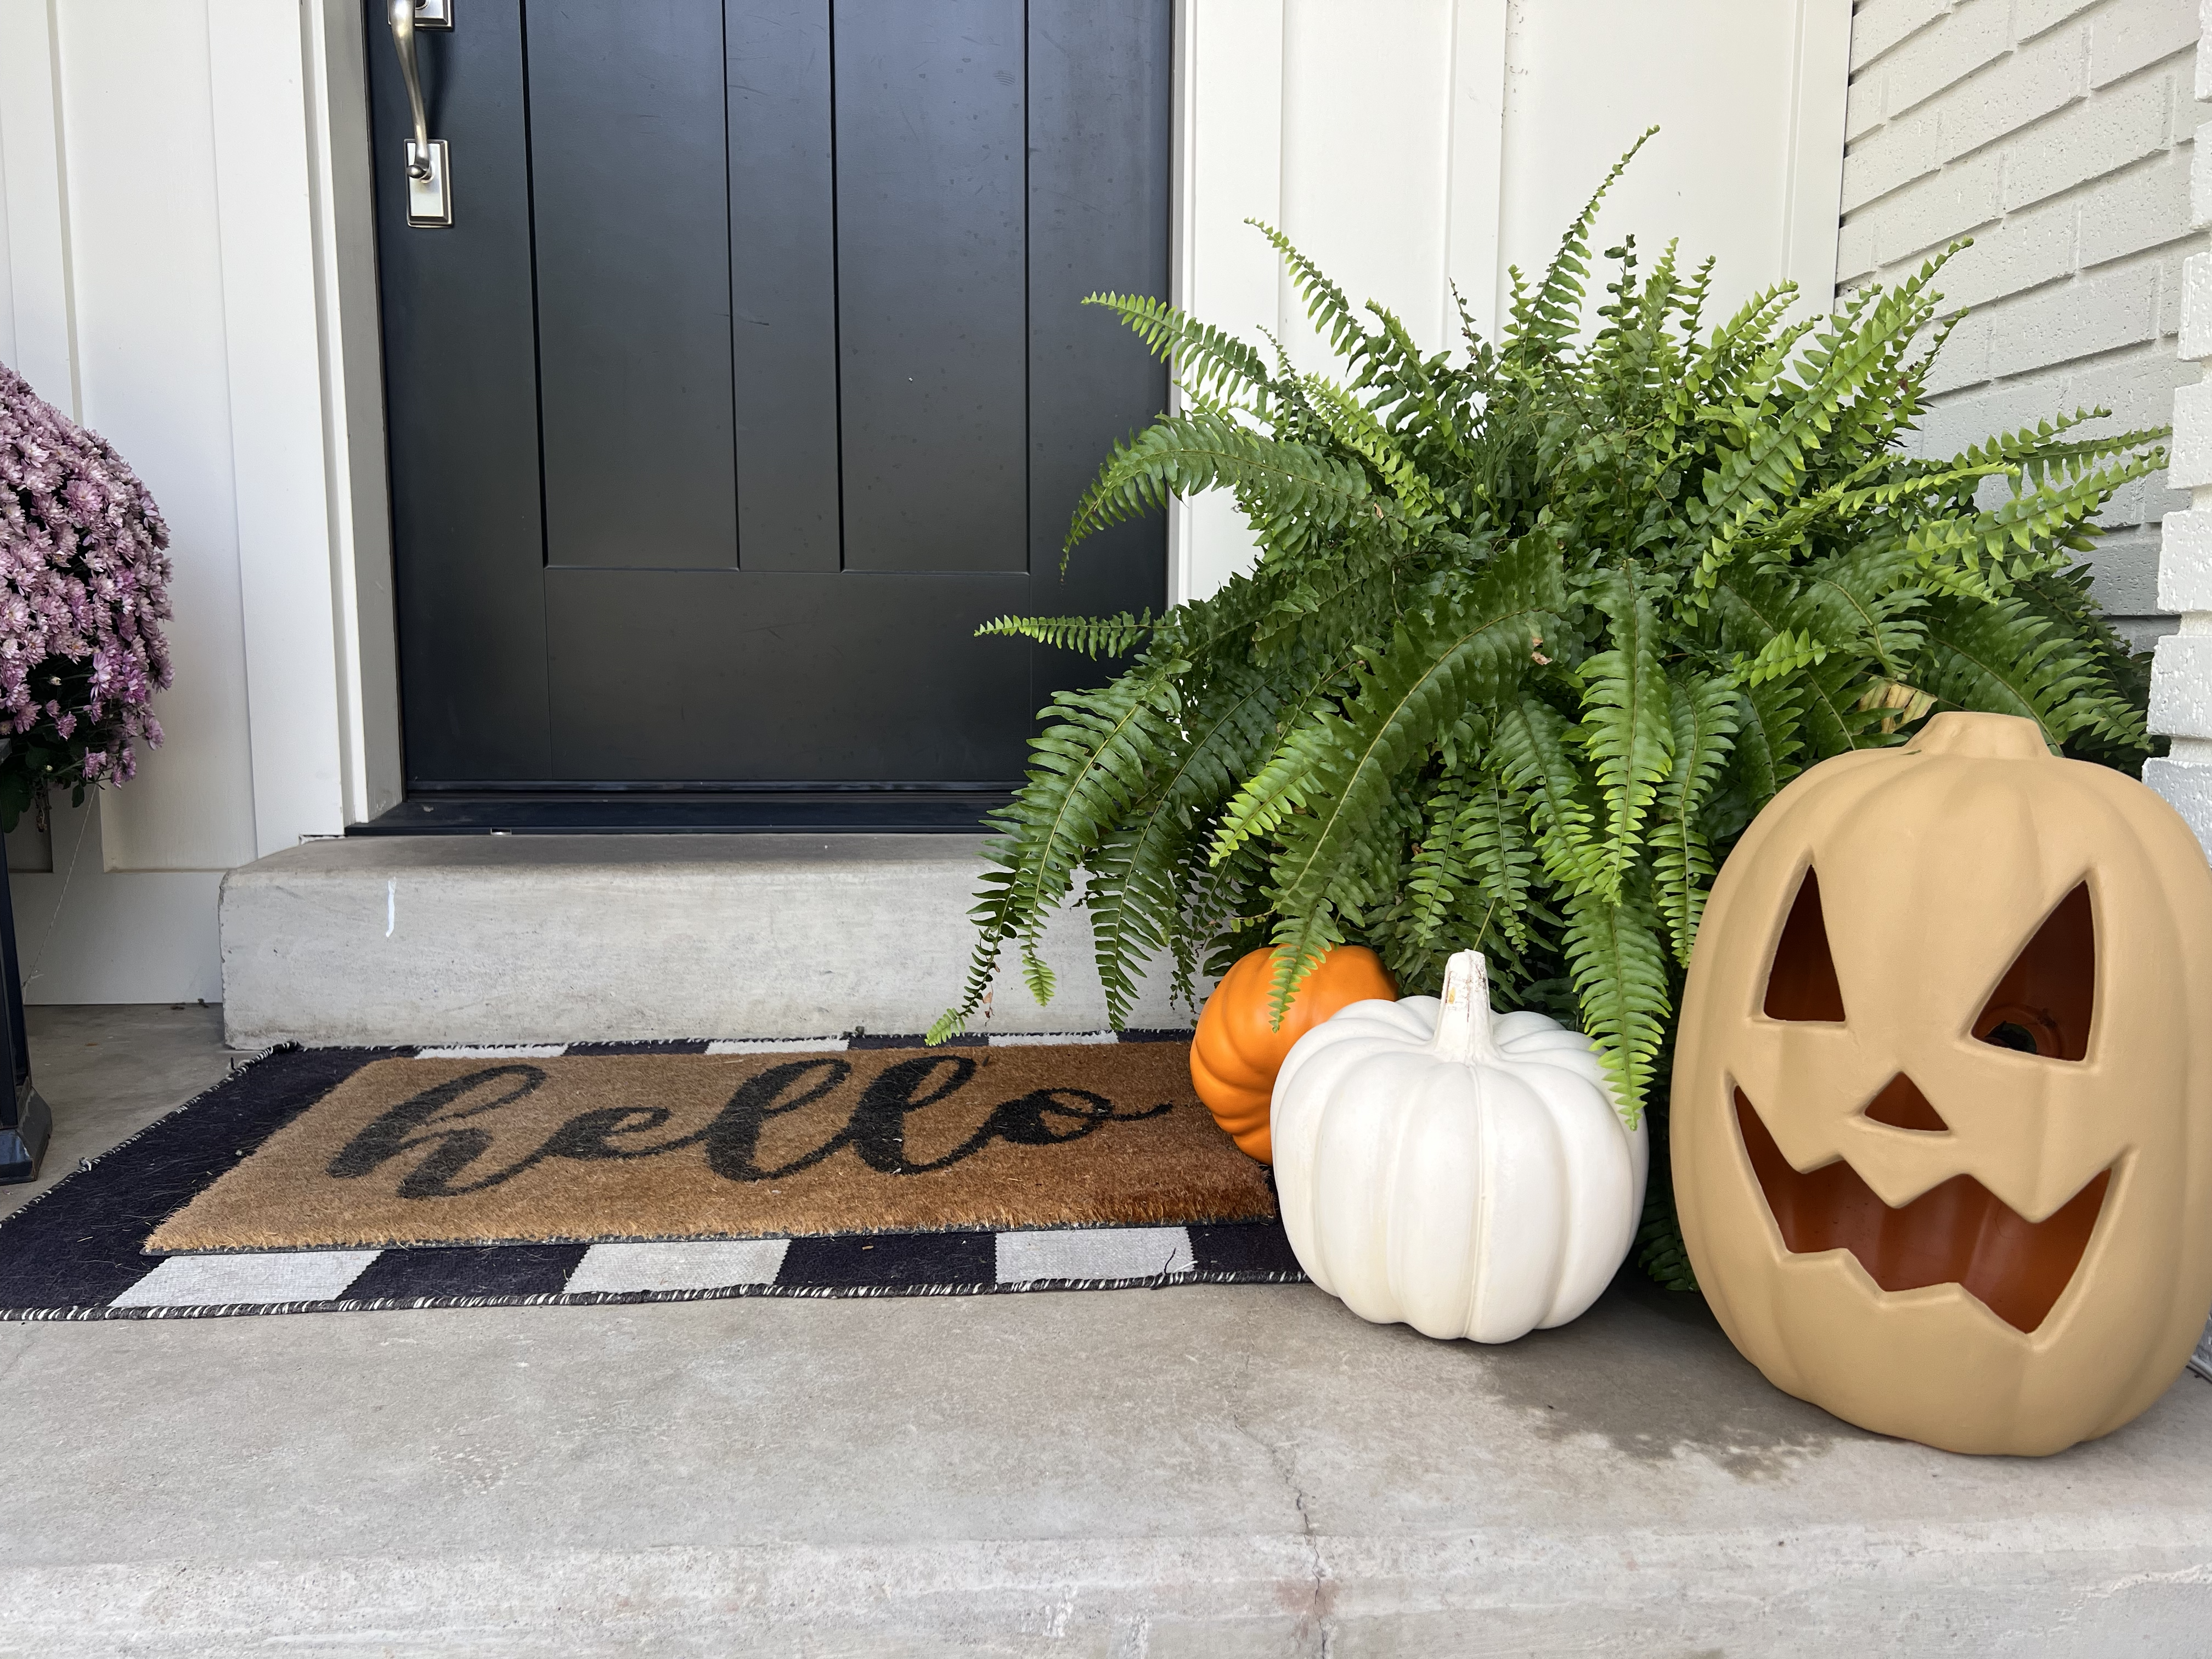
I love a good Pottery Barn dupe don’t you? I also love being able to create something for my home that I know I am going to be able to enjoy as part of my decor. Fall is my favorite time of year. I love so many things about it and pumpkins are high on that list. I don’t love the bright orange color that is associated with Halloween, so it’s been fun to take some pumpkins I already had and give them a good makeover. I loved how they turned out so much that I bought a couple more bright orange pumpkins so I could repaint them and add them to my home in a color palette I like!
A couple years ago I painted some of the same pumpkins white and black using the same process I am going to share with you here. If you follow me on Instagram, you might remember me sharing them there with you.
SUPPLIES FOR FAUX TERRA-COTTA PUMPKINS
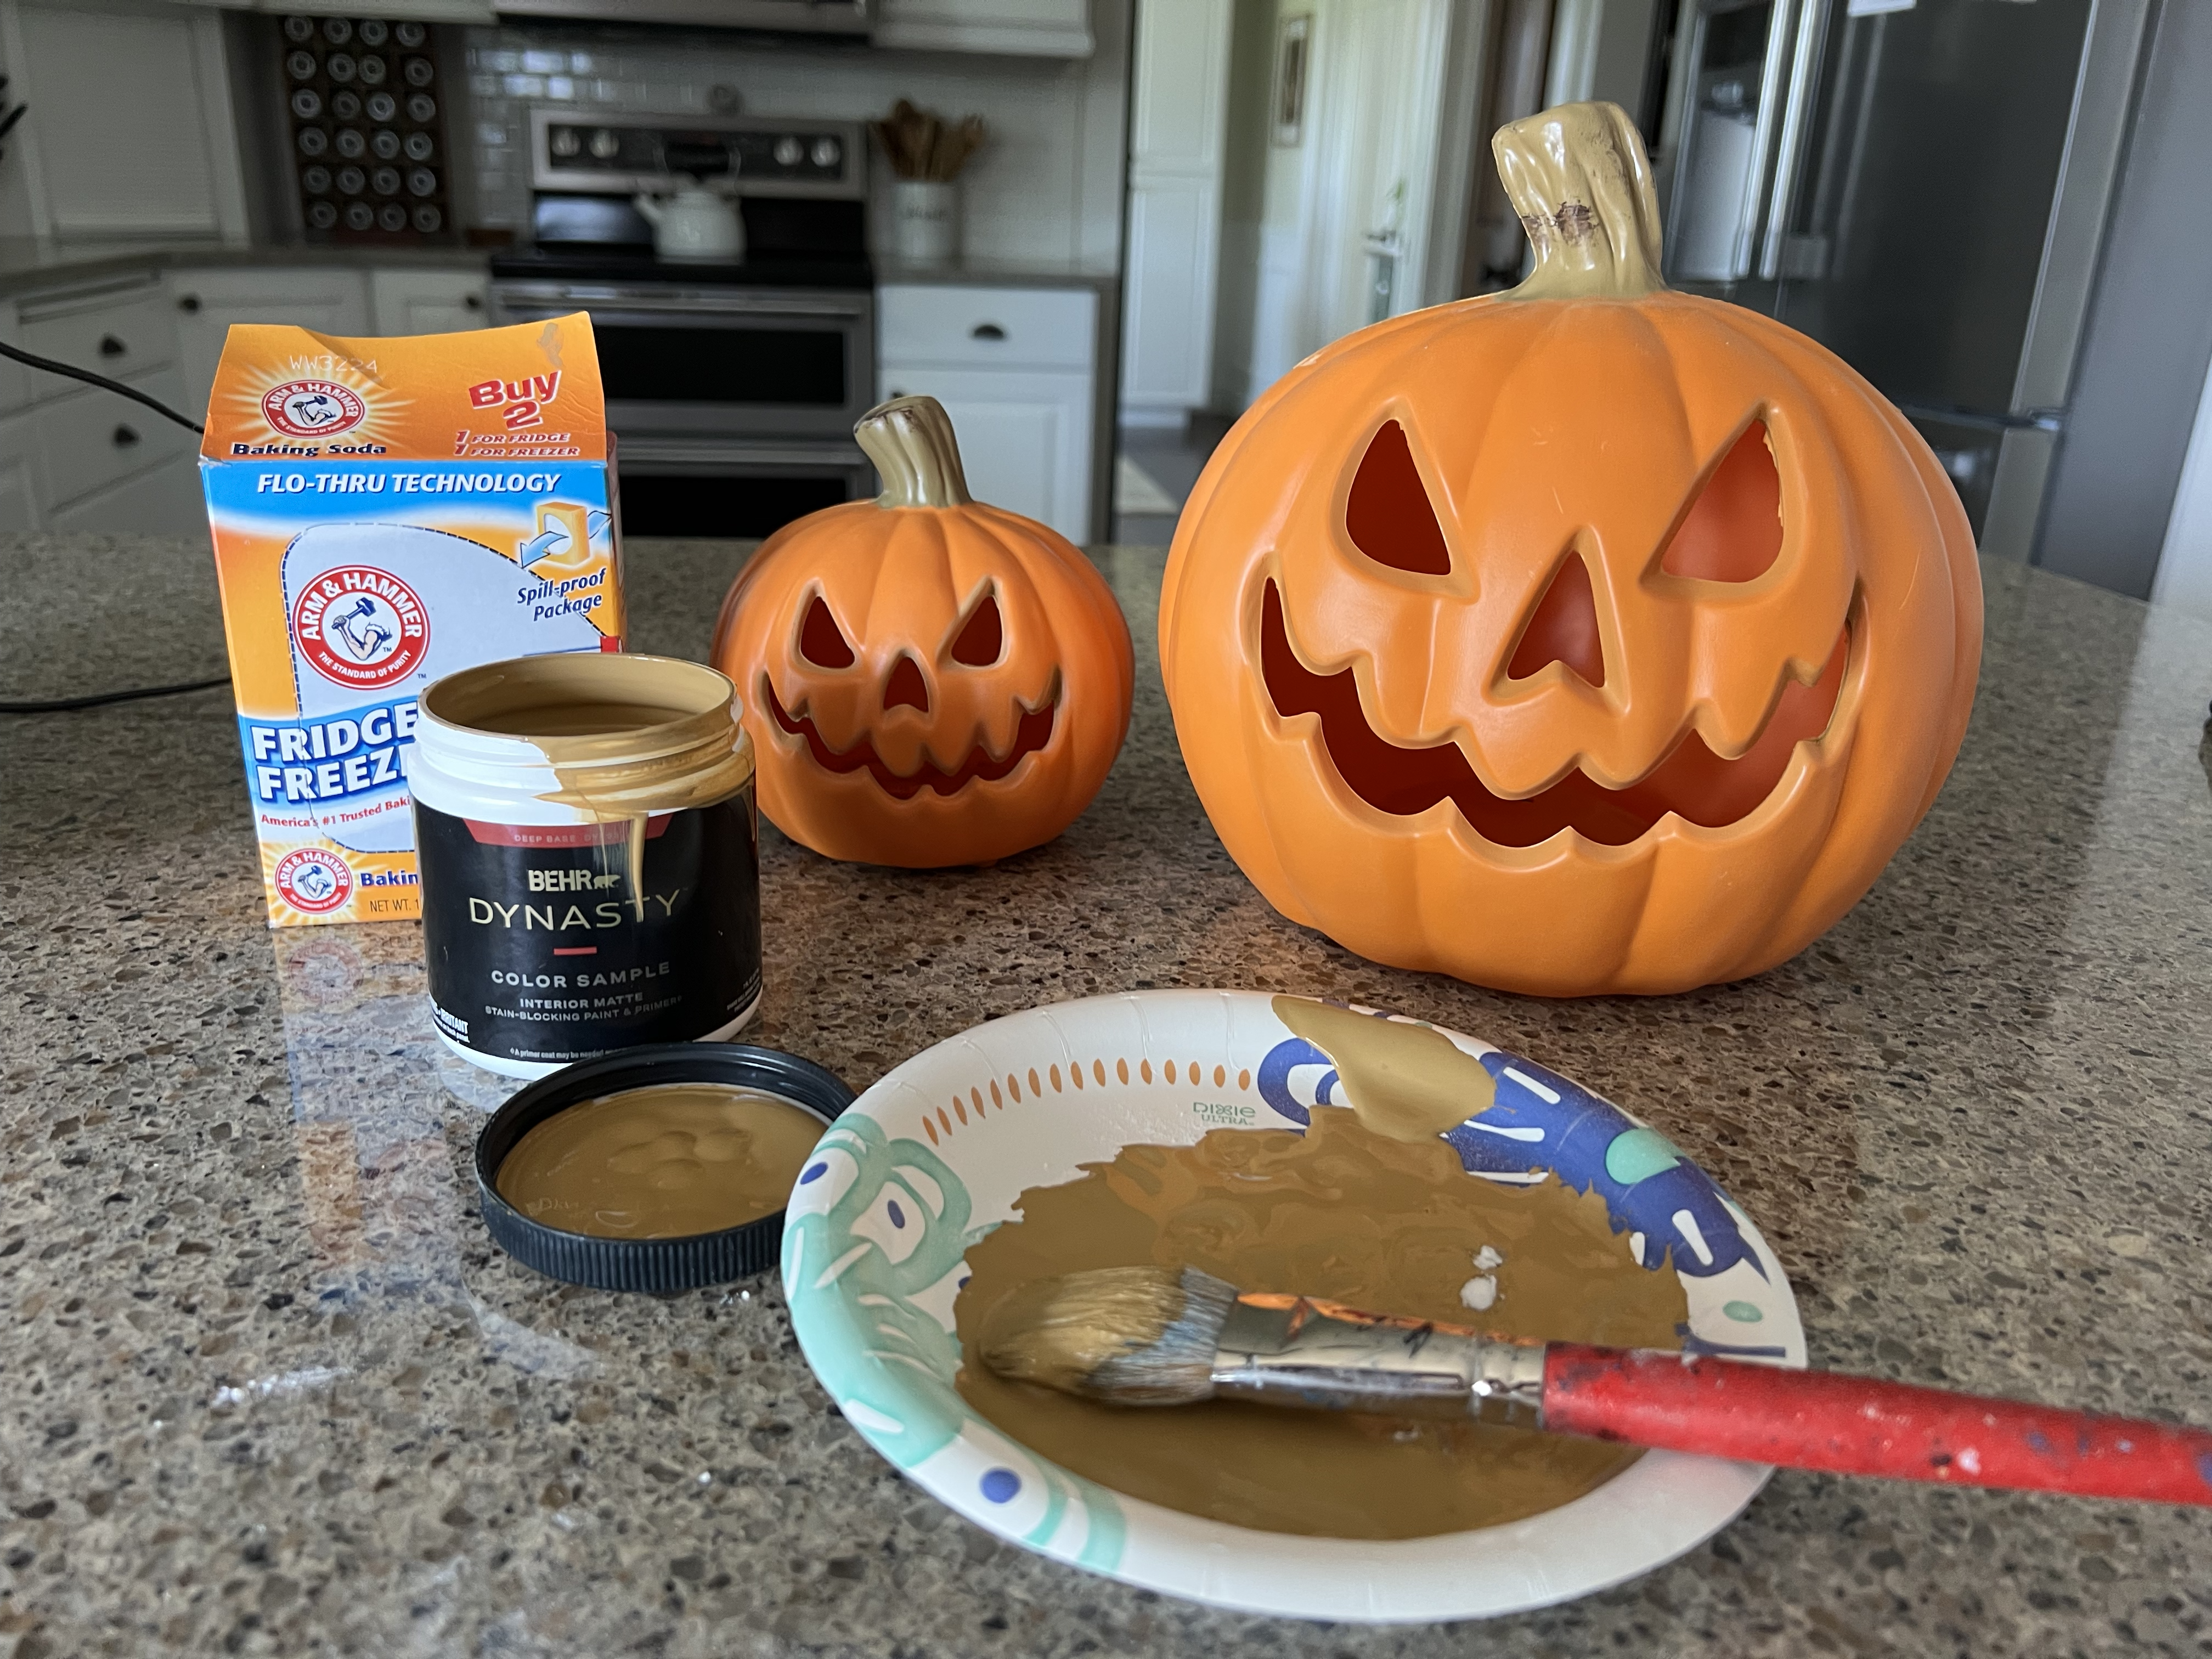
There a just a few simple supplies you need to transform those ugly plastic jack-o-lanterns into this classier terracotta pumpkins look. I bet you already have everything on hand, unless you want to use a specific color of paint other than a craft paint you might have at home! I just used some pumpkins I already had from Home Depot and Target, but I have seen them at Walmart and the dollar tree as well!
- Small plastic pumpkin
- Medium plastic pumpkin
- Larger pumpkins
- Paint (I have used black, white and this matte finish terra cotta color Hazel by Behr)
- Paint brush
- Baking soda
HOW TO MAKE FAUX TERRA-COTTA PUMPKINS
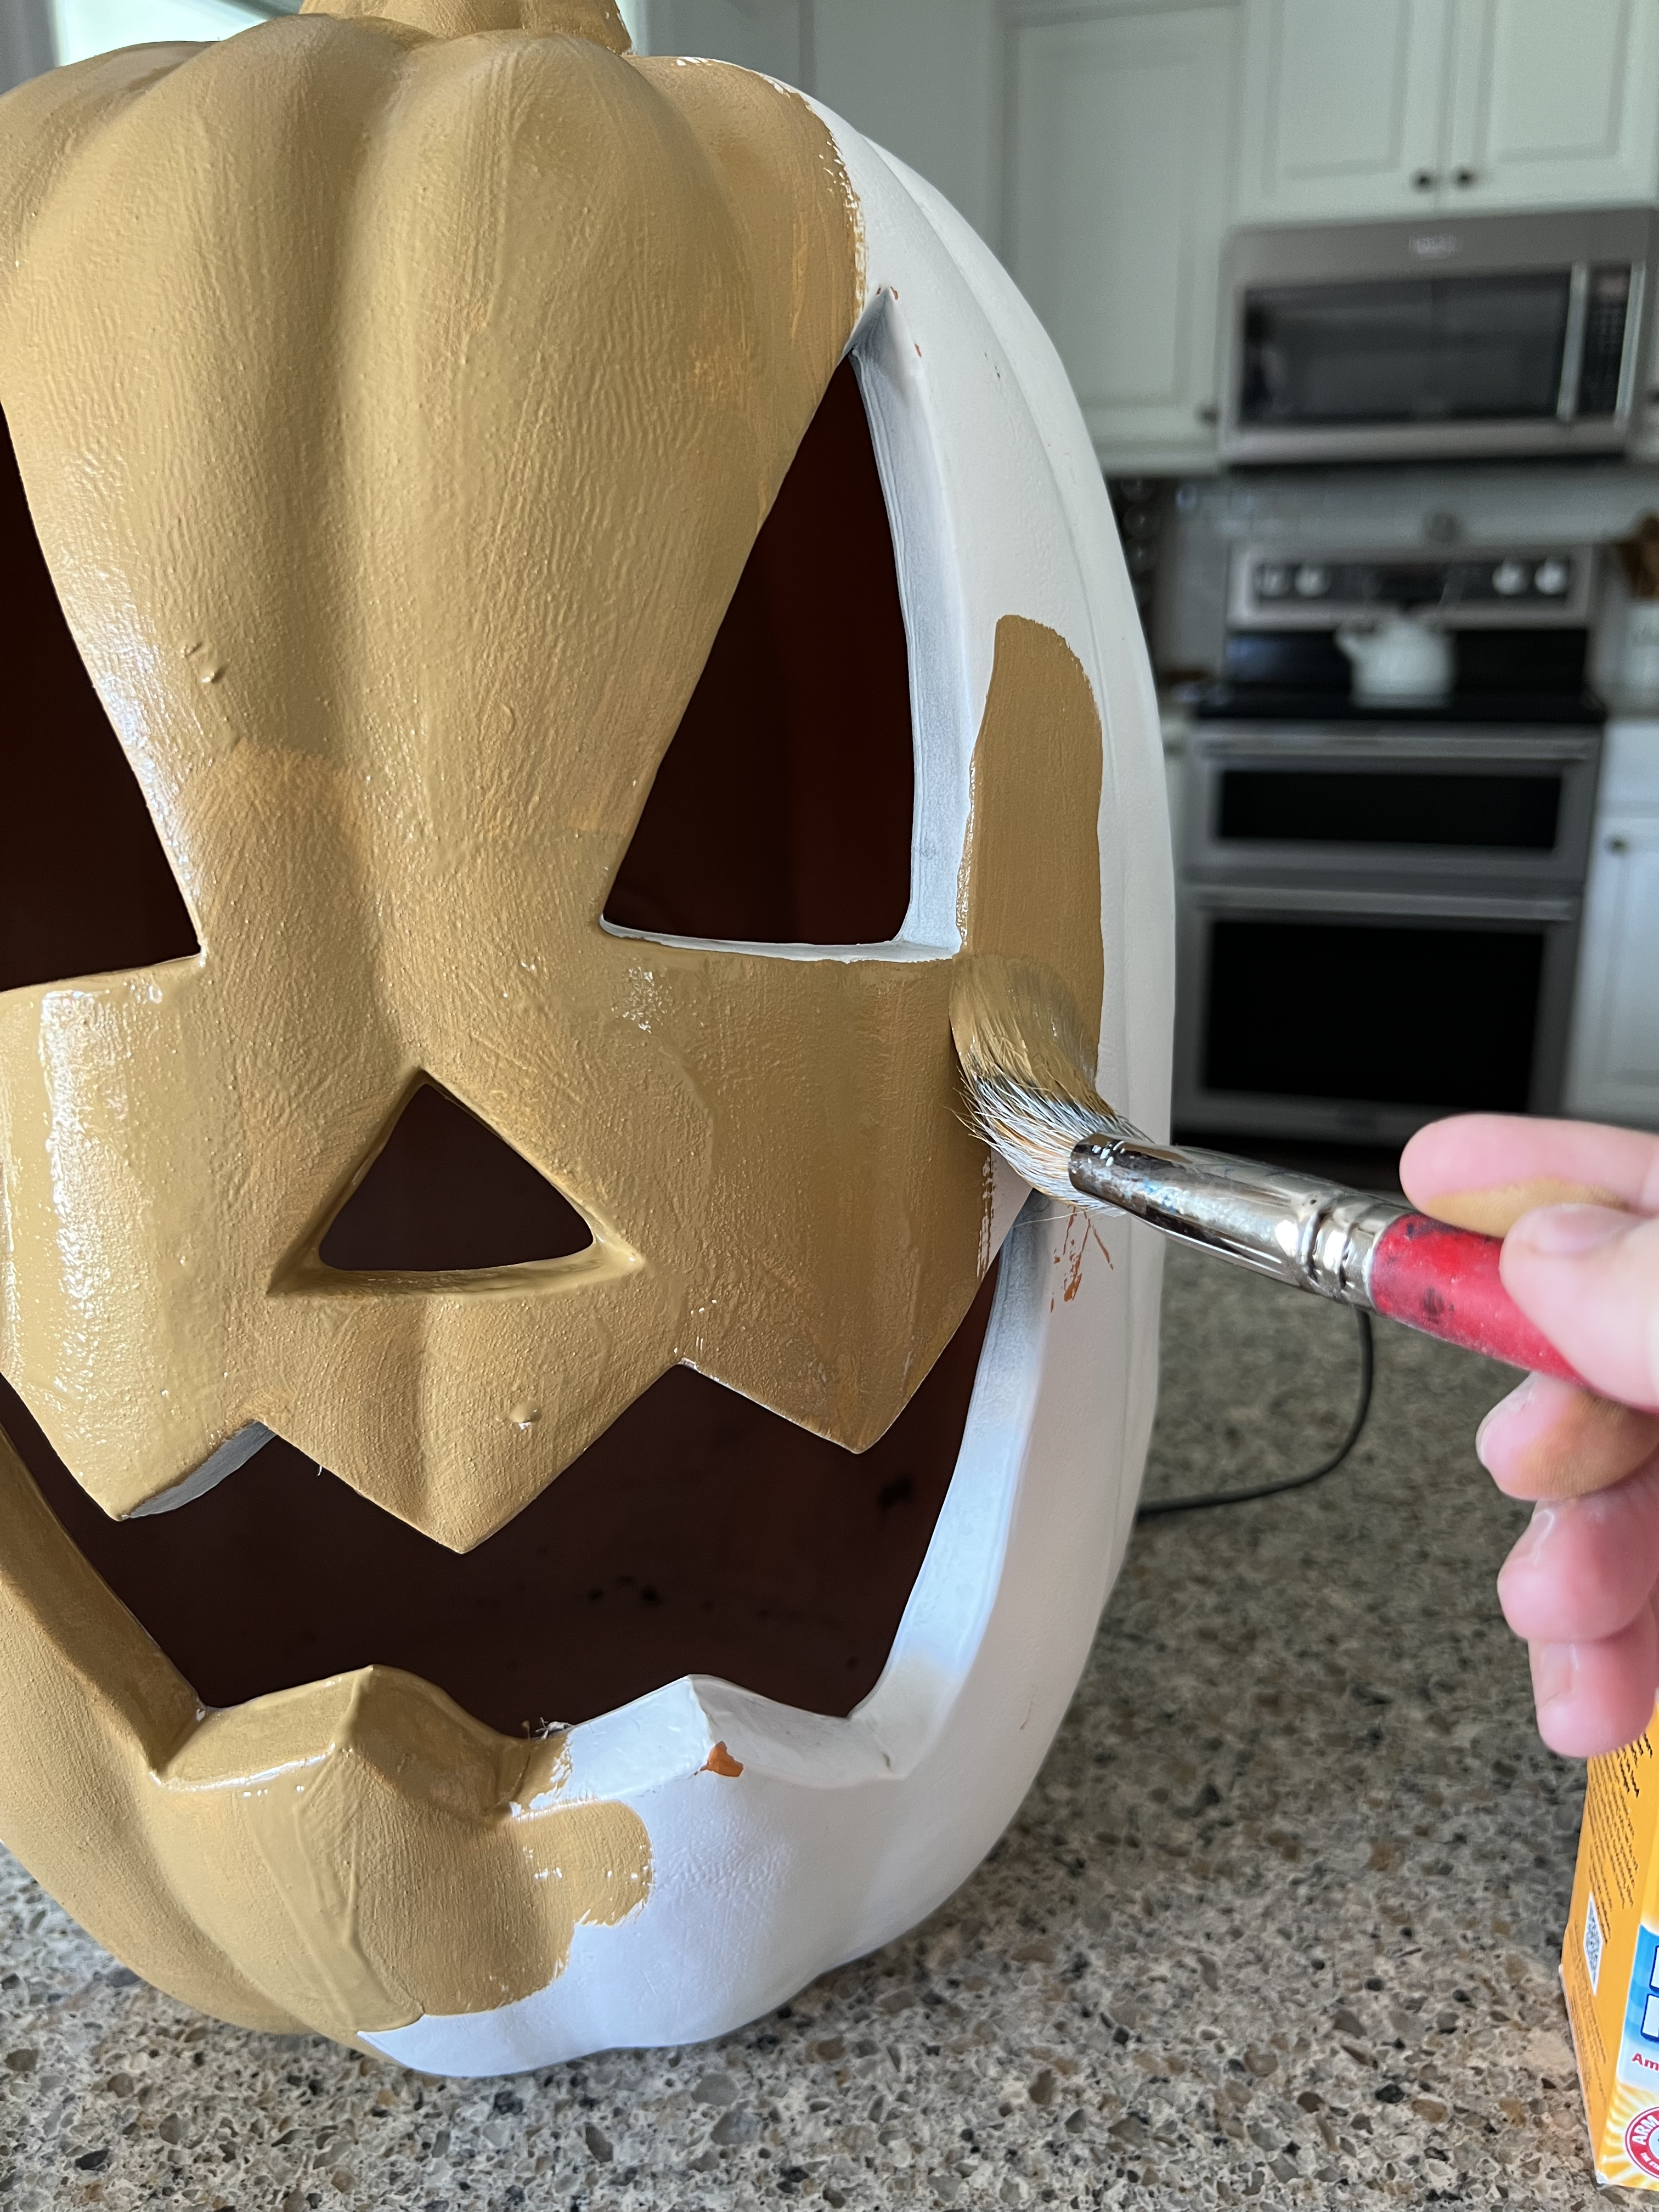
- Wipe off your pumpkin so that it is clean and dry.
- You may want to lightly sand your pumpkin so your paint will stick nicely.
- Pour some paint onto a paper plate
- Add some baking soda. (You can also use flour or plaster of paris to create texture in place of the baking soda) I just add it so that the paint is still nice and smooth without it being too chalky. The more baking soda, the rougher the texture of the final dried paint will be. So this is more of a preference.
- Stir the paint so that it is smooth and paints onto the pumpkin nicely.
- Paint the entire pumpkin. I opted to even paint the stem of the pumpkins, but you do what you like best.
- Let the first coat of paint dry.
- Paint a second coat of paint so you have nice, good coverage. Let your pumpkins dry completely.
- You can use an acrylic sealer to keep the pumpkins paint looking nicer longer, especially if you are using them on a front porch outdoors.
FAUX PUMPKIN
You can also just paint a plastic pumpkin that isn’t a jack-o-lantern to create a nice terra cotta look that lasts through all of the fall season…not just Halloween. It’s such a fun and simple addition to your fall decor. I love this trend that has been shared recently over the past couple of years…don’t you?
You can also go back to your painted pumpkin and lightly brush or sponge on a little white paint in various places on the pumpkin to really give it that terra cotta look!
WEIGH DOWN YOUR PUMPKINS
I like to weigh my pumpkins down so that they won’t blow away in the fall weather here. The plastic pumpkins are easy to weigh down. Most of them have a hole in them for the face and I simply slide in several large rocks to hold them down. If you can’t fit a rock in you can pour some smaller rocks in there to give it weight.
JOIN OUR NEWSLETTER
Would you like more Recipes, DIY, Printables and Organization Ideas?
Subscribing to the newsletter will enable us to periodically send you creative content exclusively for Idea Room subscribers.
*View our Privacy Policy here.


Amy, will this post be updated with the tutorial for this project?
I’ve got a few plastic pumpkins rolling around in the basement that I’d like to try this on.
Its fixed! IT should be showing the entire post now! :)