
Well…my crafting partner and I made it through Round Two and into Round 3 on Crafting With the Stars…YAY! Heidi from HoneyBear Lane, my partner, was the creative genius behind this and did all the hard work. Isn’t she amazing? Well, she is going to be sharing her tutorial here with my Idea Room Readers.


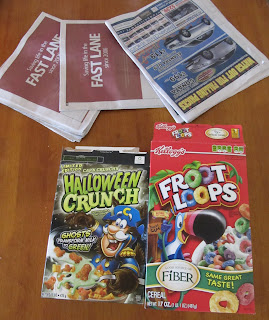 |
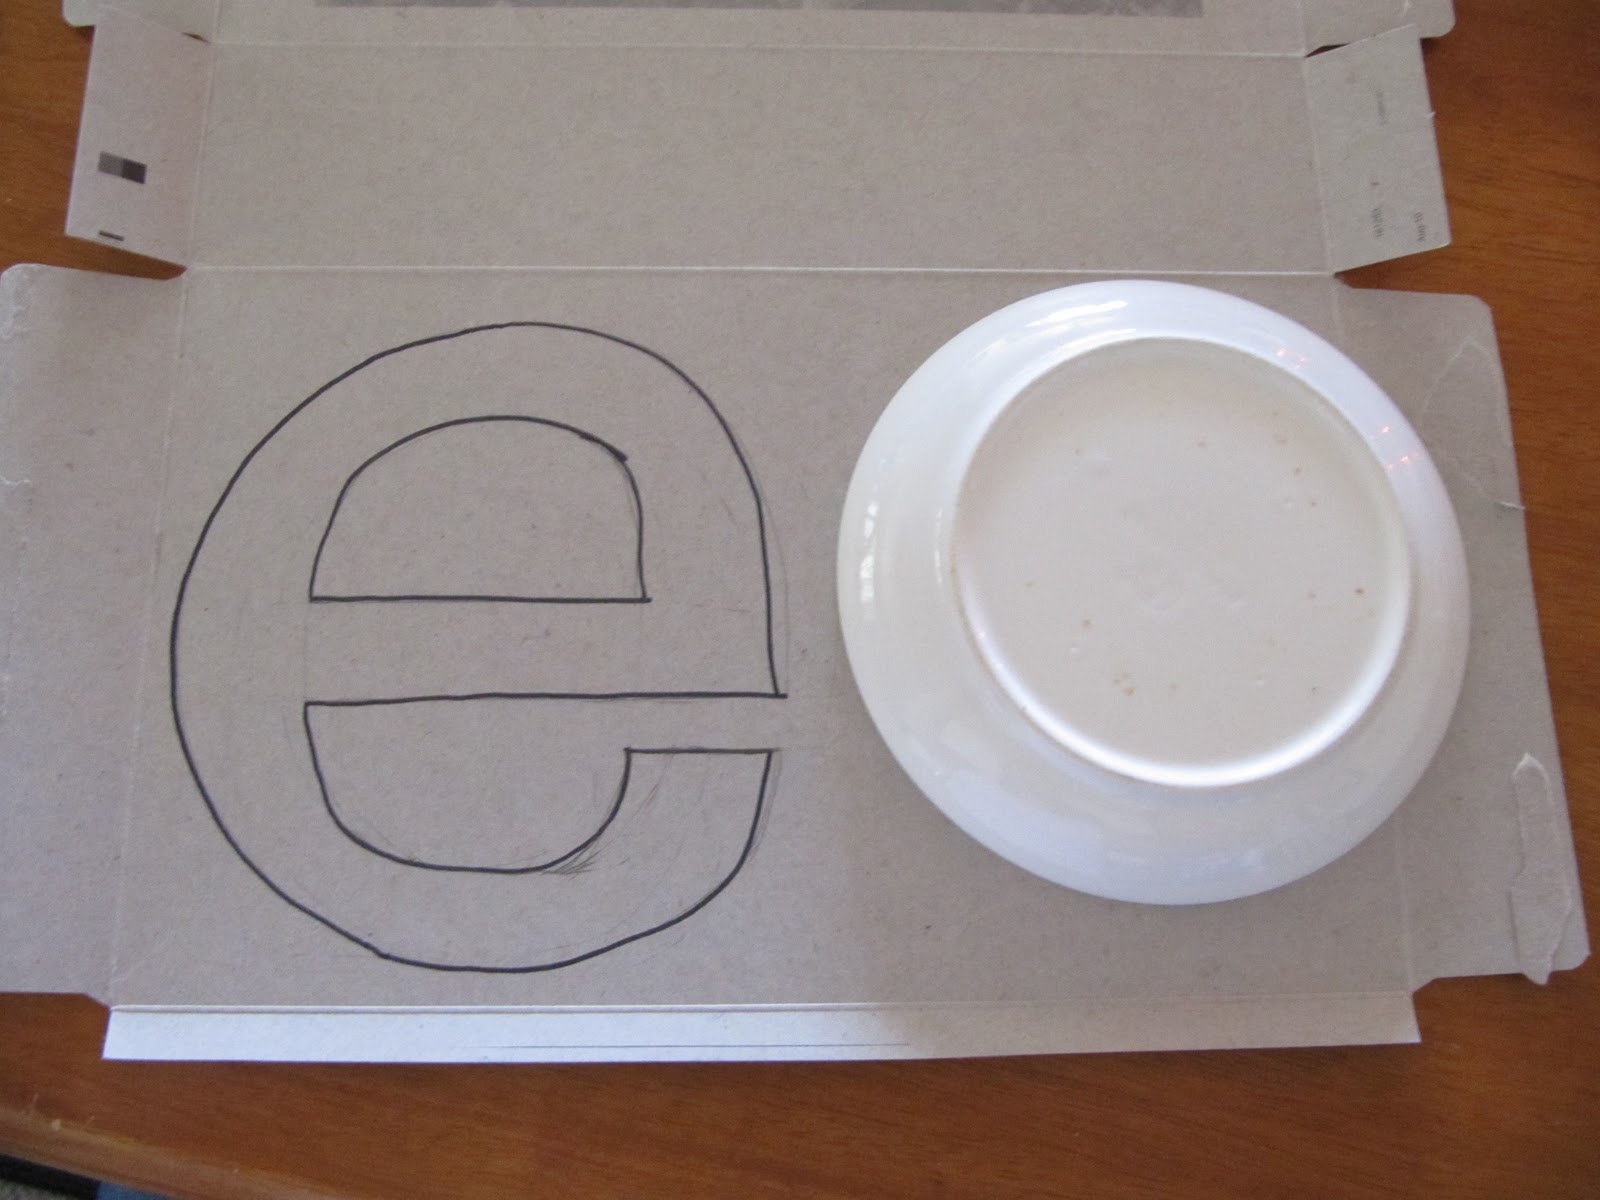
| Start with your cereal boxes to make your form. (I did NOT purchase that Captain Crunch-that’s disgusting!) |
 |
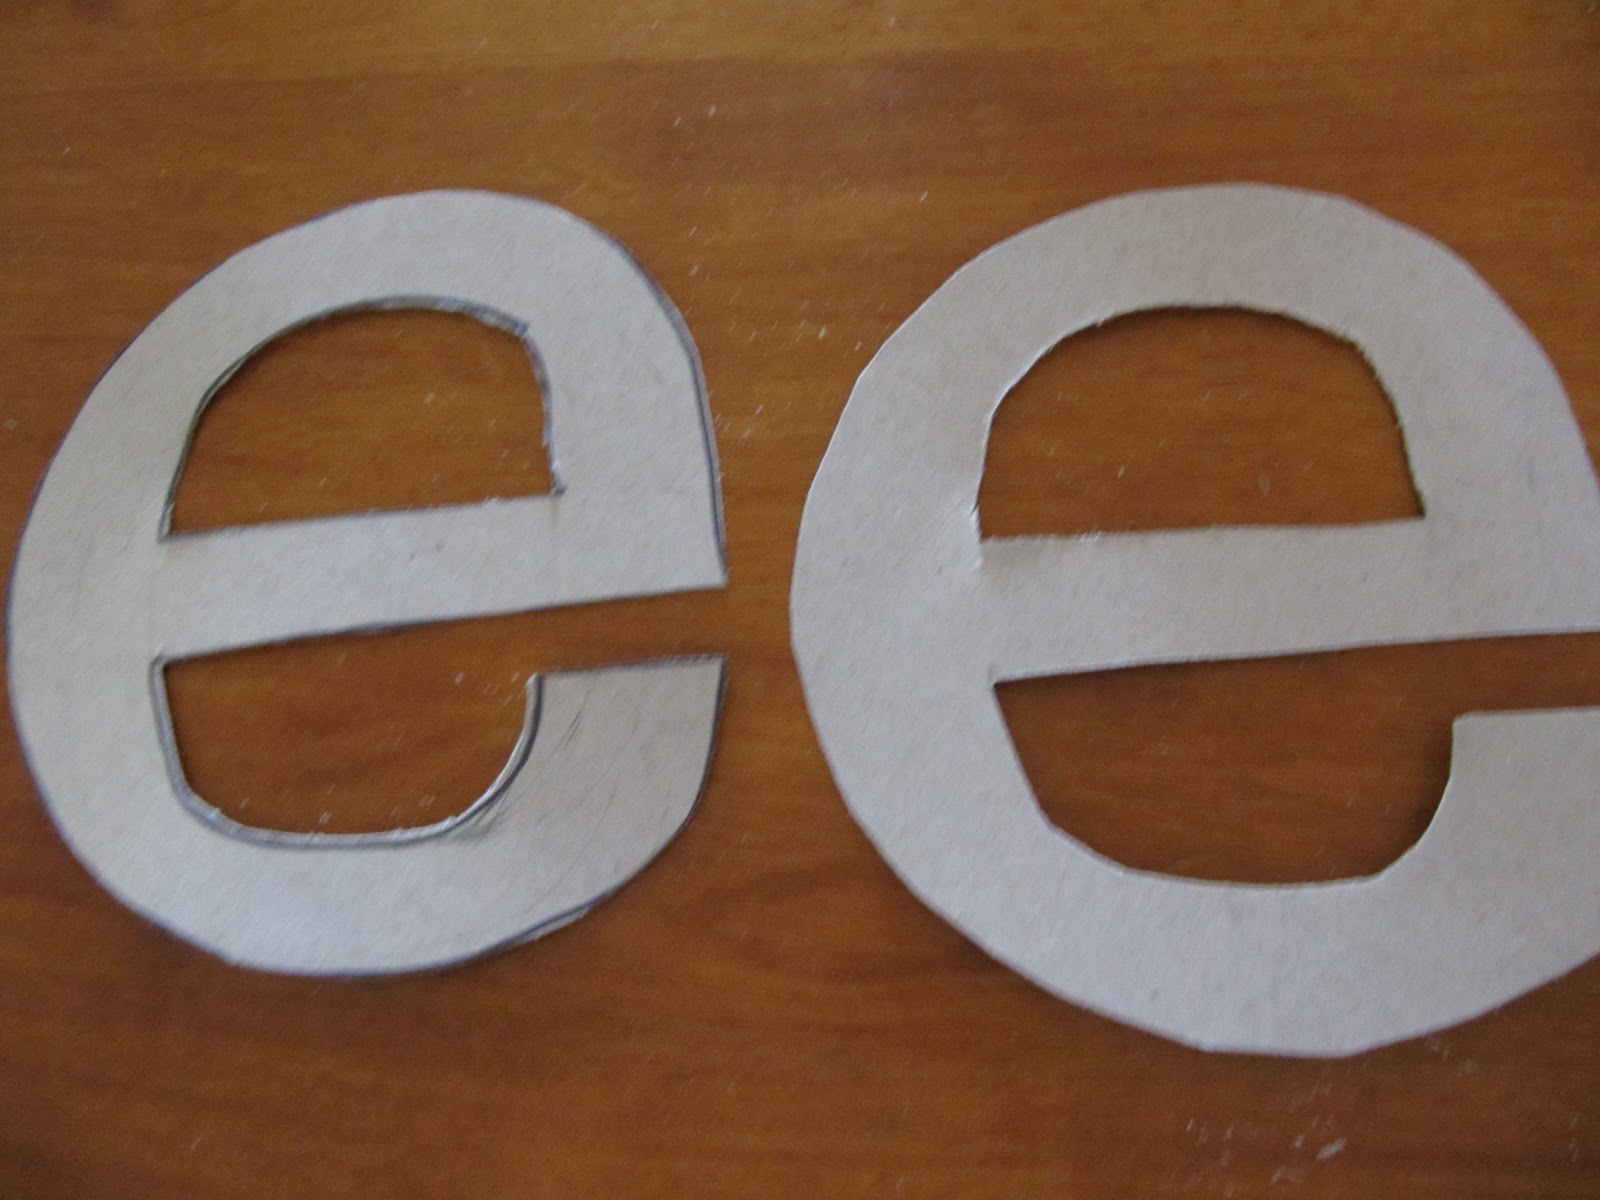
| Open up the boxes and draw your letters. I used a plate to help out with the circular form. |
 |
| When you cut it out, cut two (two thickness at a time) |
 |
| Start twisting and shaping newspapers and tape them into one of your letter shapes. |
 |
| When you’re all done, tape the other letter shape on top, making a little sandwich. |
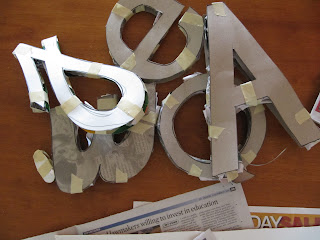 |
| Finish all your other letters, you can experiment with size, case, and font (cursive vs print.) |
 |
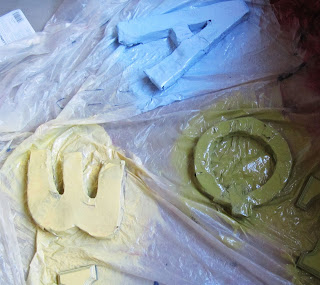
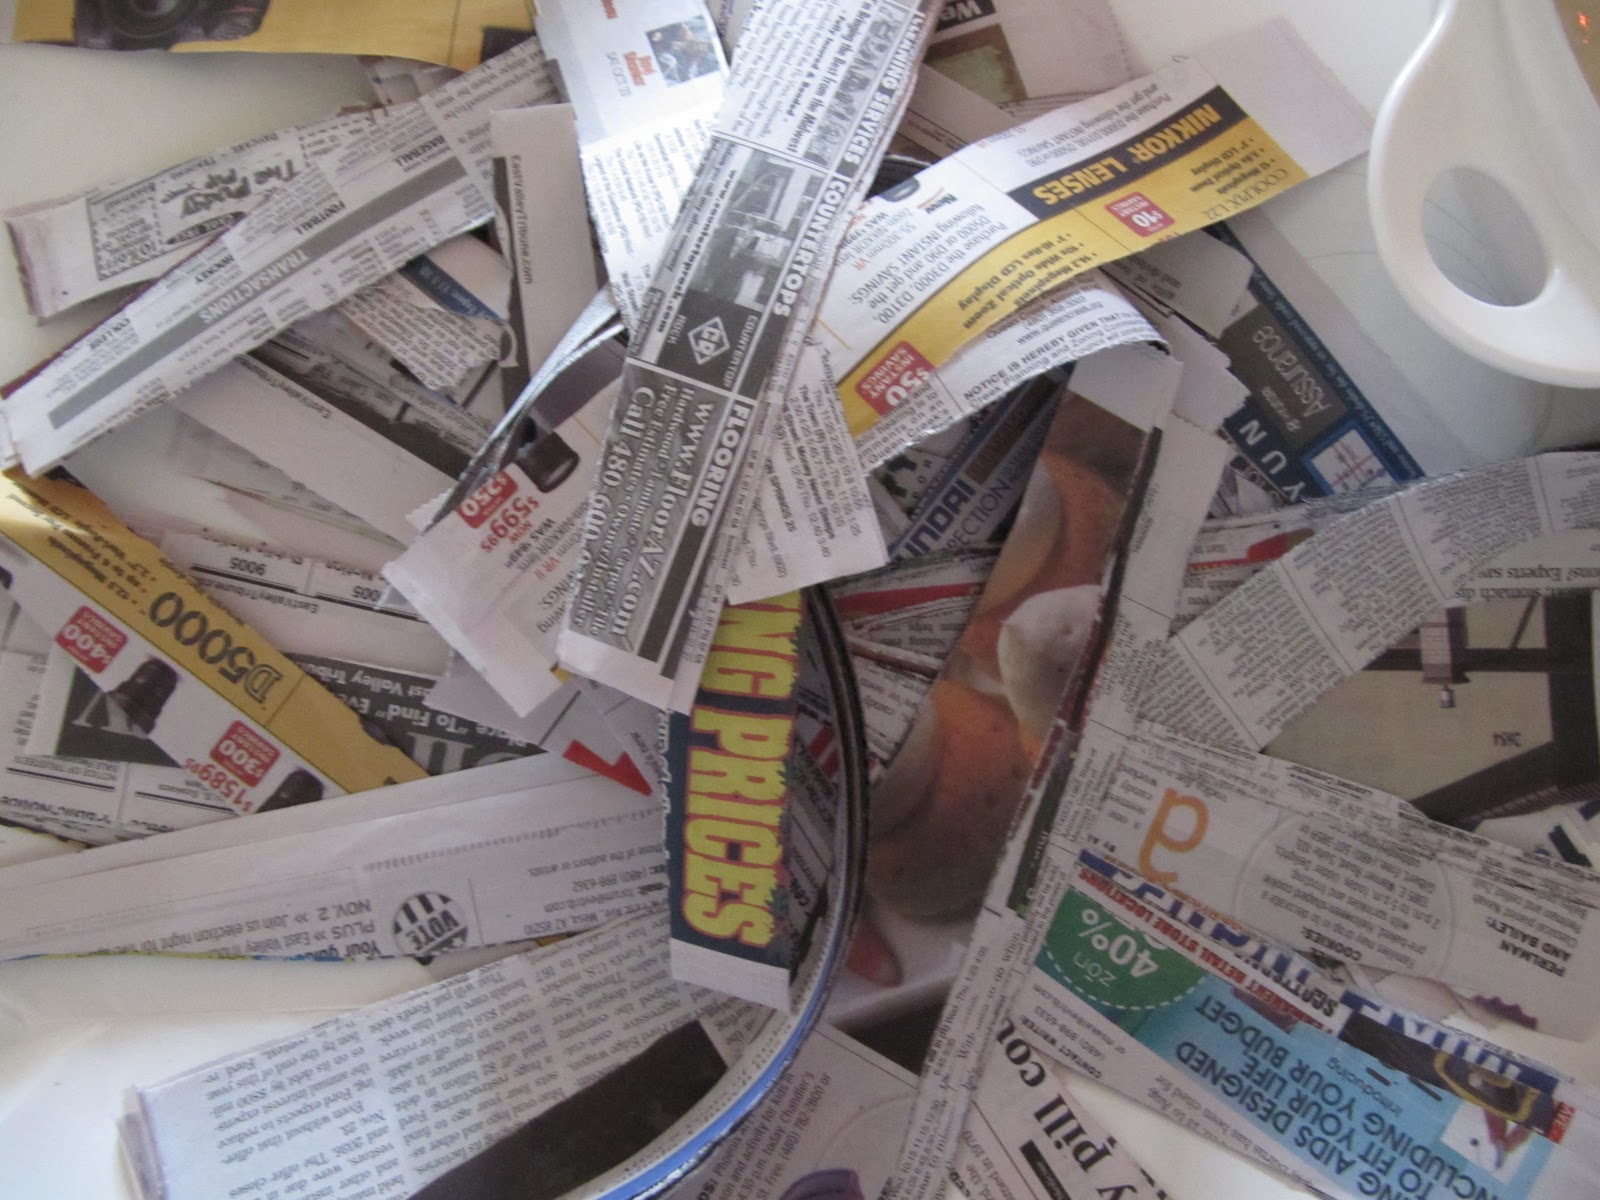
| Dig up your paper mache skills from elementary school…rip or cut up newspapers into strips. |
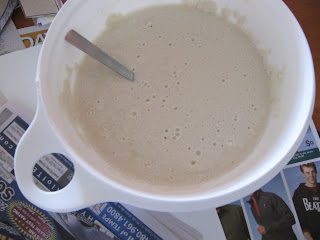 |
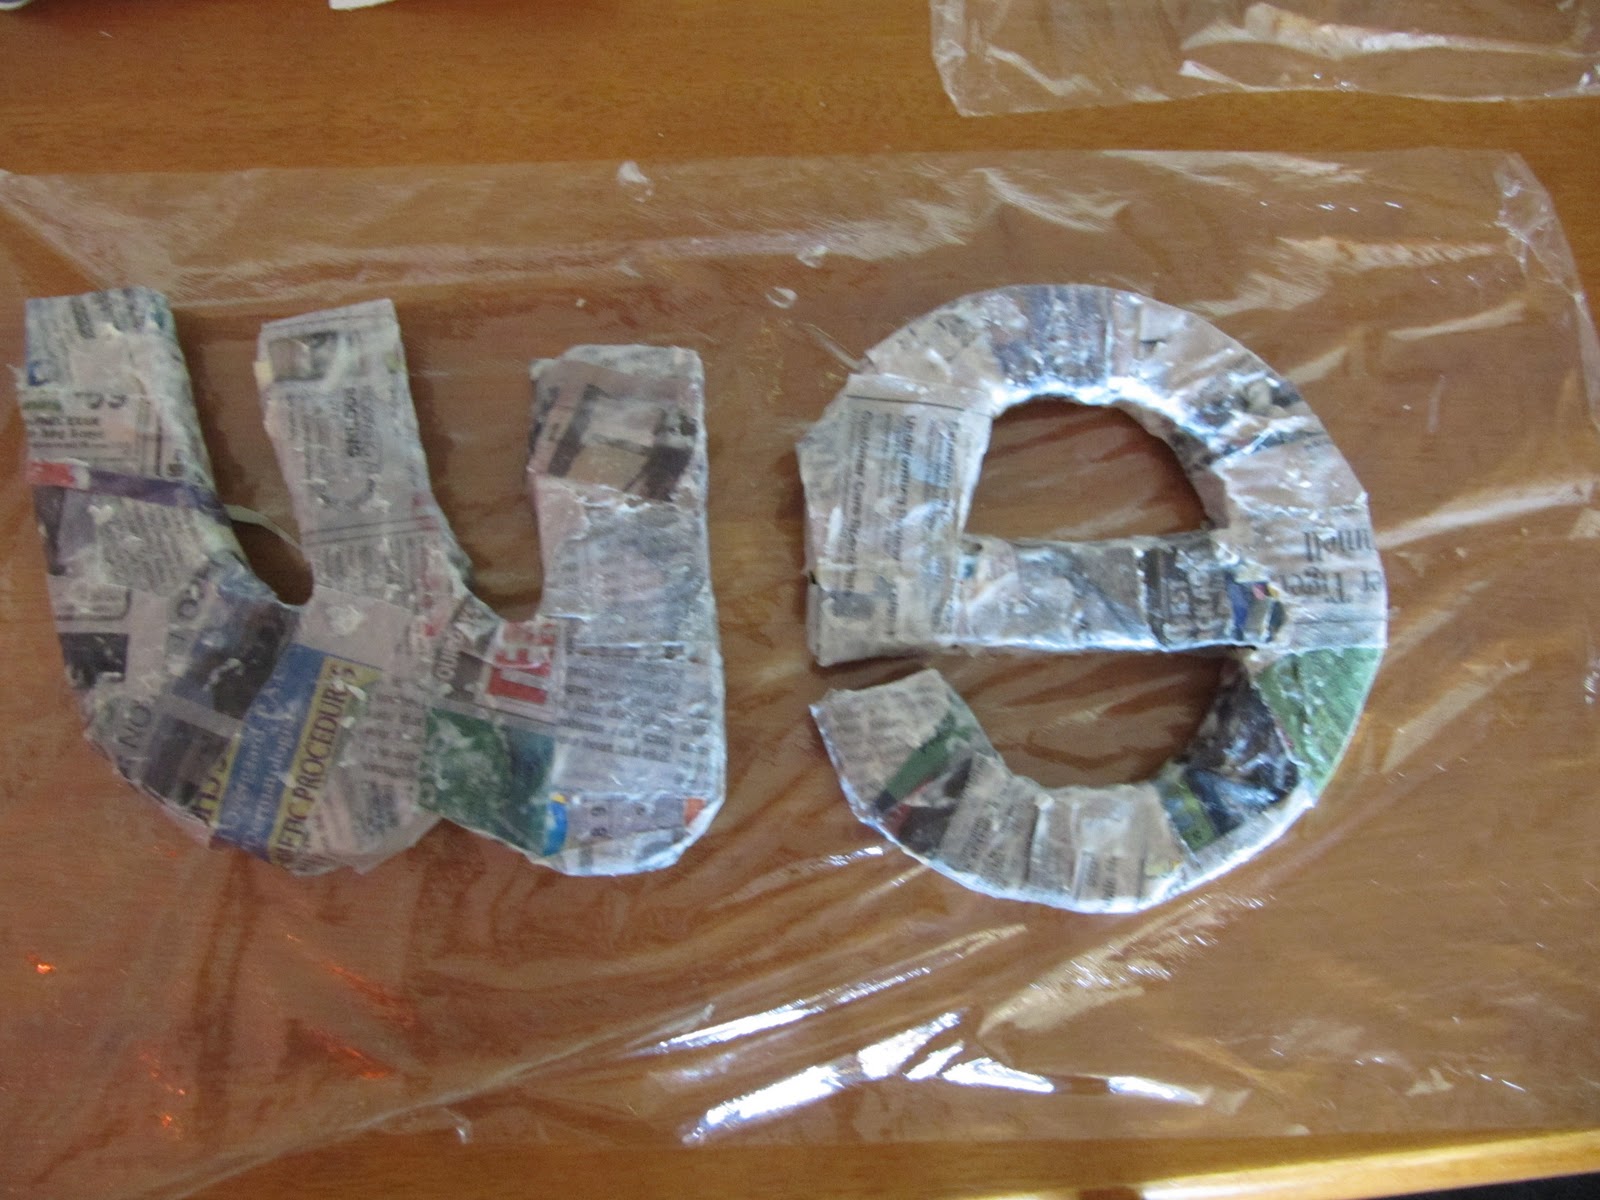
| Mix your paste…mine is us a bunch of flour and water. I didn’t even measure anything. I don’t have a picture of me doing the paper mache because it’s WAY too messy. Basically you just dip your paper in the paste and squeeze off the excess with your fingers. Then carefully wrap the paper around your form. Cover the whole form. |
 |
| I laid my letters down on plastic wrap to let dry so they didn’t adhere to the table or something. I had to let them dry for a good 24+ hours. |
 |
| Sand your letters a little to get a smoother surface and then spray paint them! |
 |
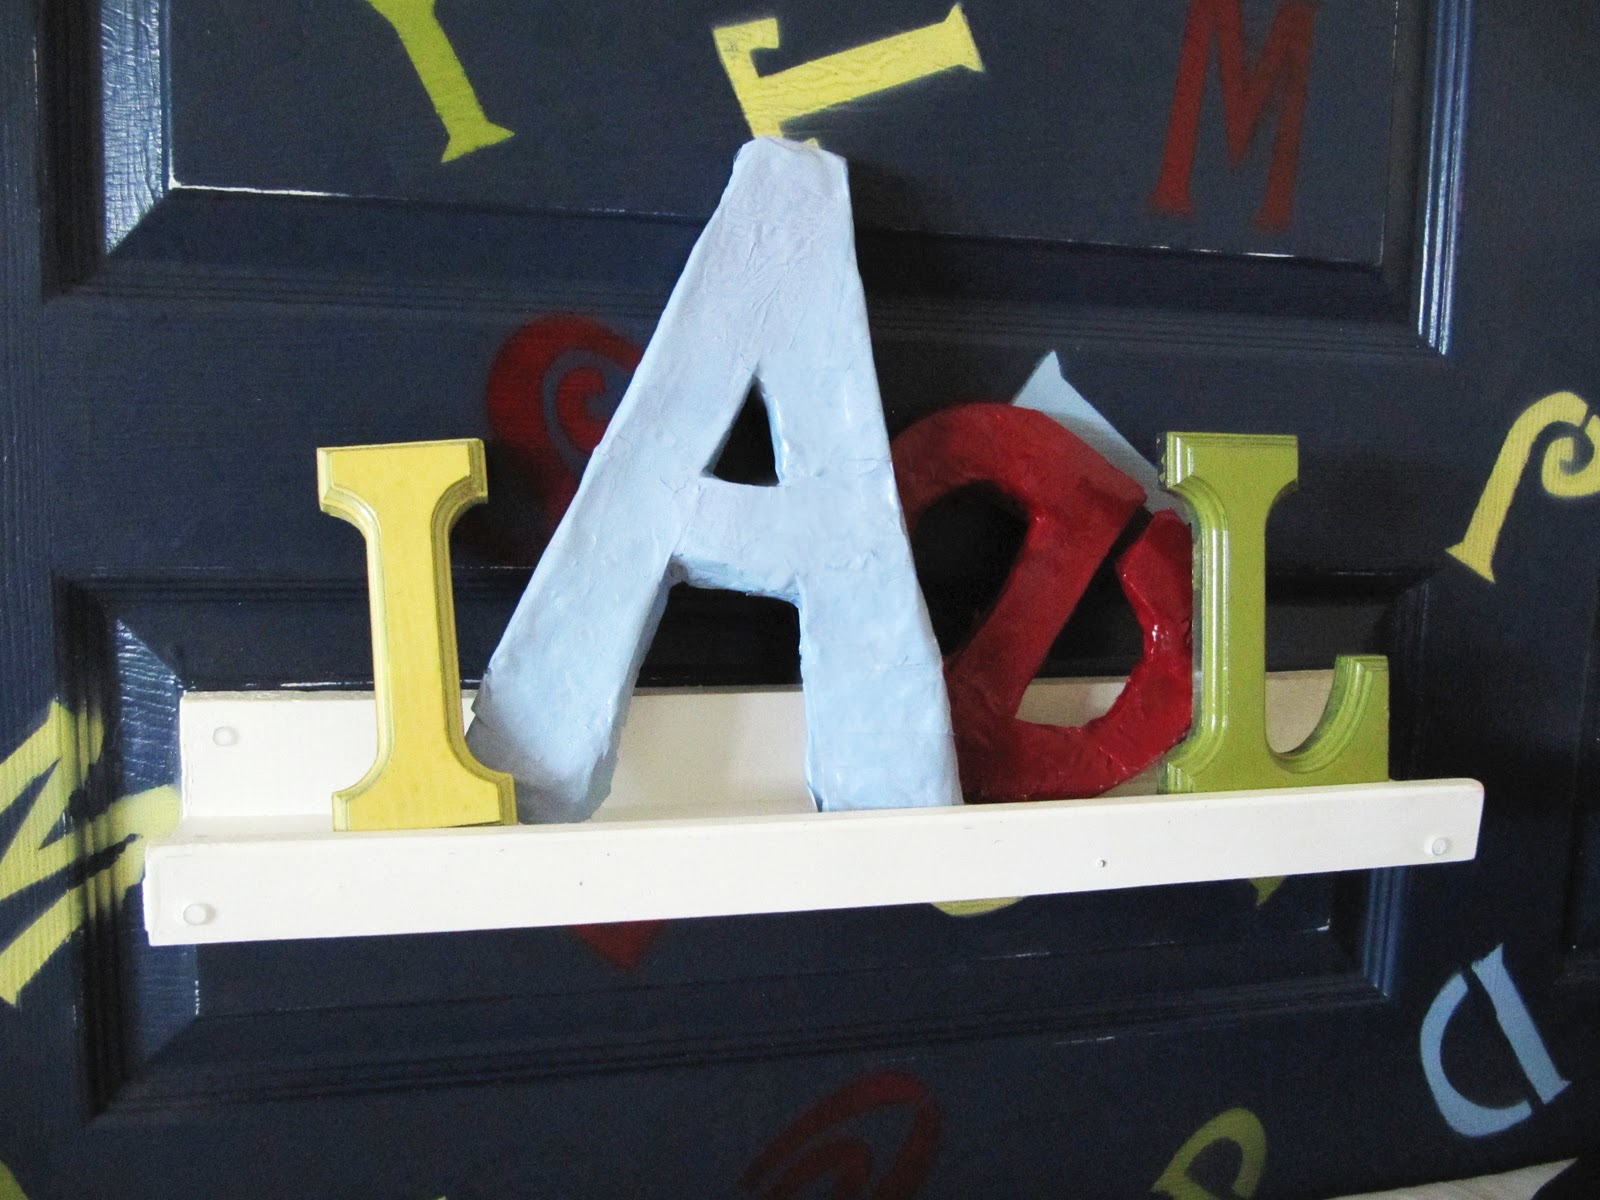
| The letters “A” and “e” are paper mache…the others are some old wood ones I had. |
 |
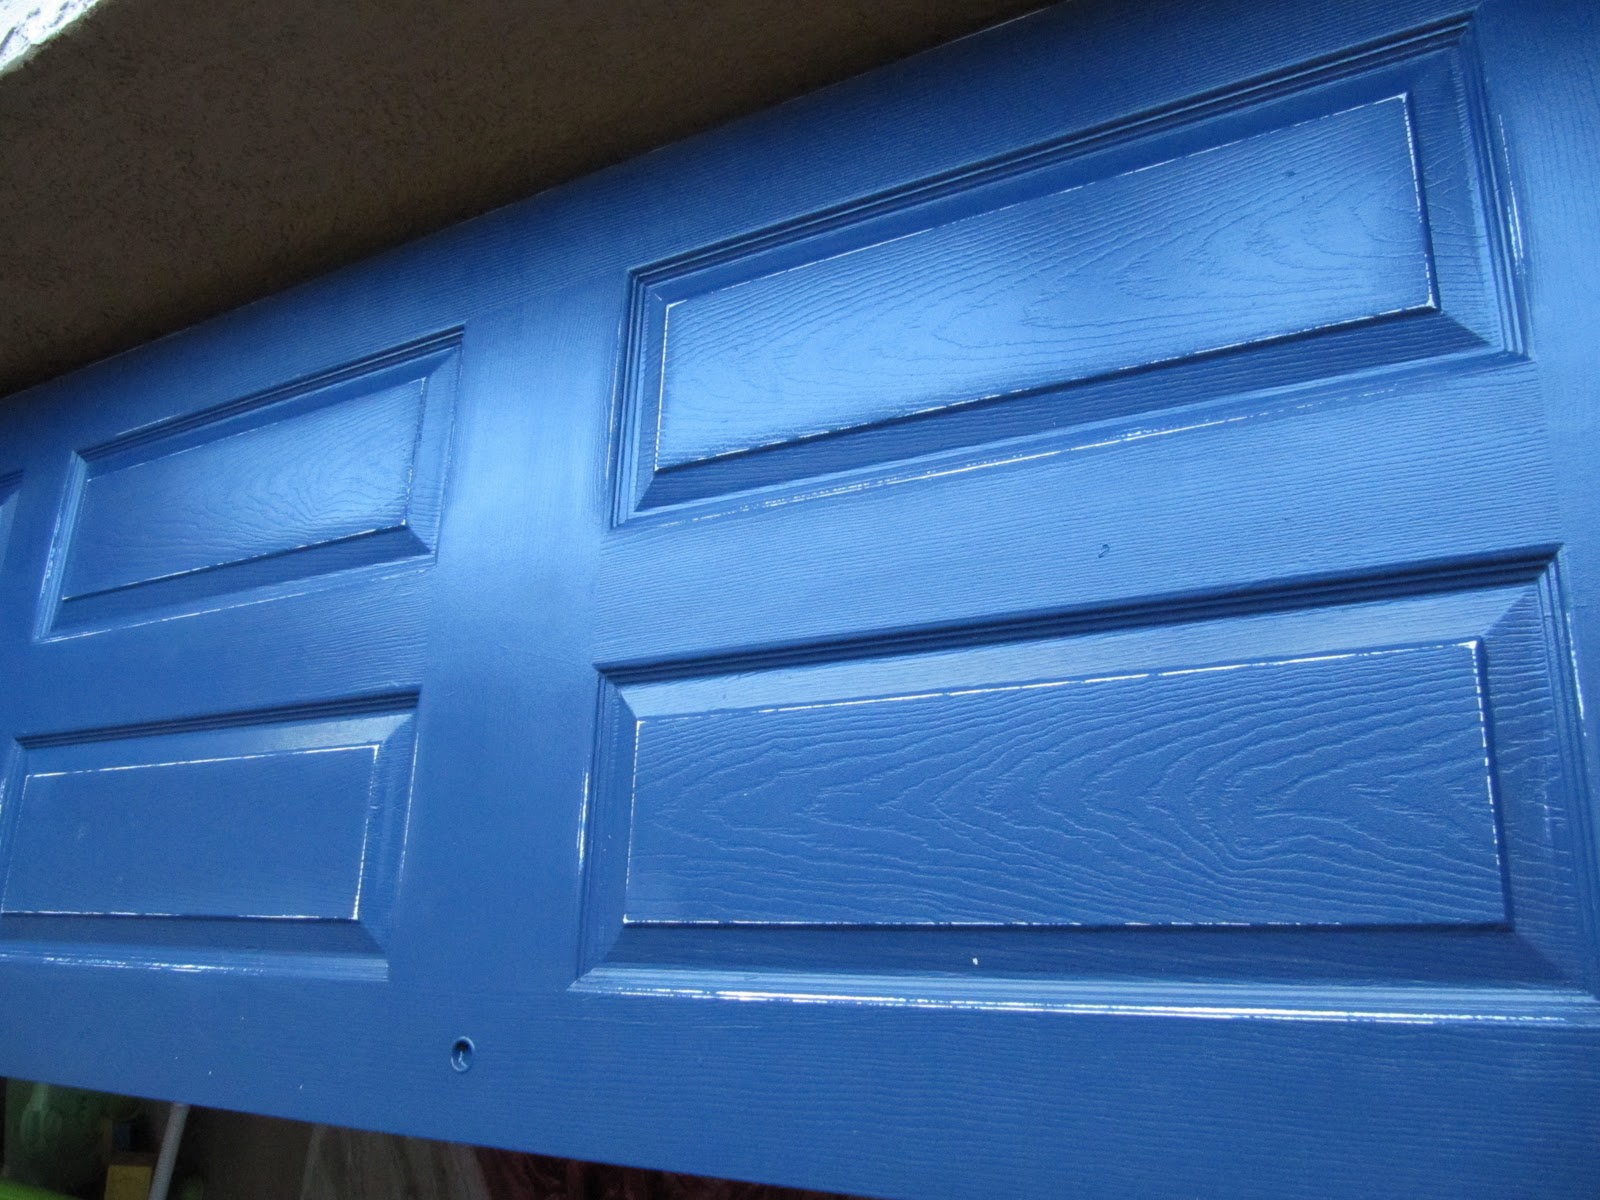
| For the sideboard: Paint your door. Here’s a painting tip: paint one coat and then let it fully dry. Your painting job will look pretty bad at this point and you will be tempted to just keep painting. But you have to let each coat dry fully to get the most mileage out of your paint. So just go over the surface once and then let it dry. Repeat, repeat, repeat. |
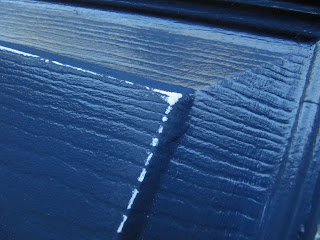 |
| After I painted the door, I sanded some corners to distress it a little. |
 |
| To stencil the letters, I bought this pack of stencils at Walmart for like $3. I laid them haphazardly on the door, making sure that the letters were not in any particular order. |
 |
| To spray paint, tape down the stencil first with masking tape. Then I cut a rectangle out of some cardboard to make a guard. Mine wasn’t nearly big enough though so I had to do a lot of re touching. |
 |
| Spray on your letter! Then go crazy with all different colors! |
 |
| I was loving this…but it needed something, since my paper mache letters wouldn’t cut it. I considered putting up a big word in white, (like DREAM) but then my sister suggested some shelves. |
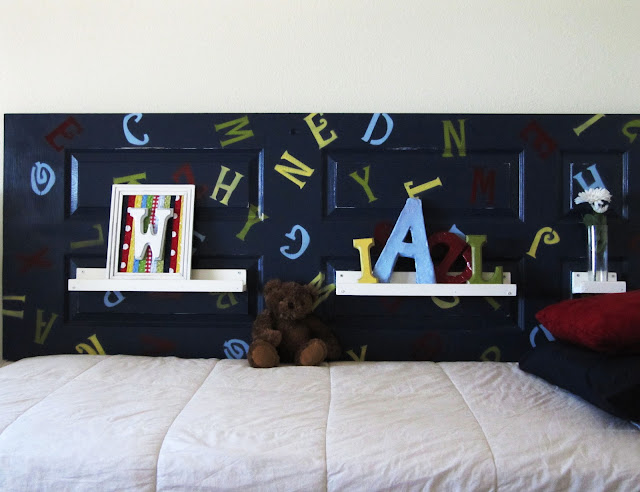 |
| Genius. I. LOVE. THEM. I am a huge lover of shelves anyway, or organization in general. |
To get the tutorial to build these shelves, check out Ana White’s blog Knock Off Wood. It was super easy and made me feel all handy (not as awesome as Sandra from Sawdust & Paper Scraps though, have you seen what she can do?)
Little projects like this totally push me out of my comfort zone though and I want to tackle more wood projects! And I’m going to be putting these type of shelves all over my house, since they are a super easy way to display tons of framed pictures. I made my shelves with cull wood from Home Depot so they were also really inexpensive.
To attach the shelves to the door, I just screwed them straight in. And to hang the sideboard up, we screwed long screws straight into wall studs. Shh, don’t tell my apartment managers! That’s what wall putty is for, right?
I have been in the process of decorating my kids’ room for a long time now, and it’s been going very slow since I keep getting interrupted with other stuff. So expect to see lots more little things on this process in the next year. This sideboard really makes a huge decorative impact though, I love it!
–Heidi from HoneyBear Lane
★Amy
JOIN OUR NEWSLETTER
Would you like more Recipes, DIY, Printables and Organization Ideas?
Subscribing to the newsletter will enable us to periodically send you creative content exclusively for Idea Room subscribers.
*View our Privacy Policy here.


Congrads on making it through to another round!
I love the result of this project. I'm tempted to try paper macheing (sp?) some letters of my own. Thanks and congrats!
I love it! i voted for this project…it was my fav!
Oh my gosh, I made some papier-mache letters awhile back that I *still* have not had the heart to blog about… it took hours!!!!
So congrats for making them & making it through!