
Have you ever made your own unique ornaments from the glass or plastic ornaments? Clear Chirstmas ornaments are such a cute and inexpensive way to personalize your Christmas tree, gifts and create beautiful keepsakes! Today we are sharing several how to’s and ideas for filling clear plastic ornaments, you’ll wonder why you haven’t tried them before now.

WHAT CAN I FILL CLEAR ORNAMENTS WITH?
There are so many fun ways to fill a clear Christmas ornament (or bauble). I just gathered a fun collection of Christmas ornament ideas down below to help you see all the fun ways to fill your ornaments. So I thought it would be fun to also round up some different materials to fill your up your ornaments with.
- candy
- beads
- paper
- glitter
- fake snow
- ribbon
- photos
- quotes

SUPPLIES NEEDED FOR CRAFTING WITH CLEAR ORNAMENTS
Here is a list of some very common supplies and materials needed to make fun filled clear glass Christmas ornaments!
- fillable glass ornaments
- fillable plastic ornaments
- half opening fillable plastic ornaments (great for larger items)
- glitter
- acrylic paint
- polycrylic
- funnel
- plastic syringe
- ribbons
- plastic cups
HOW TO DECORATE WITH CLEAR PLASTIC ORNAMENTS
There are a lot of fun and clever ways to take those boring clear plastic ornaments and use them to create beautiful gifts and home decor items. Here are some fun ideas and ways to use fillable ornaments:
- hang on the Christmas tree
- gift to neighbors and friends
- hang on your Christmas Stockings
- attach to a garland and drape on a mantle or staircase railing
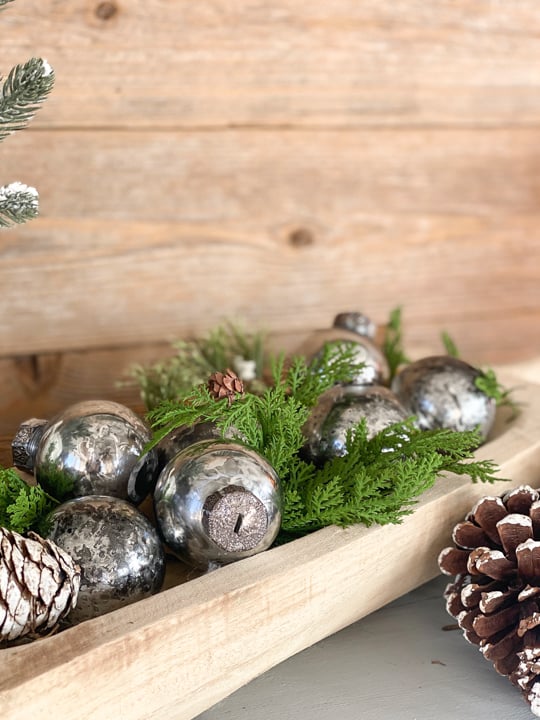
- fill a bowl with greenery and place ornaments in the bowl
- glue together to make a wreath
- string them together to make a banner
WHAT CAN I USE TO FILL CLEAR PLASTIC ORNAMENTS?
There are so many fun uses for these ornaments and so many fun ideas to fill them with. Really, if it fits, you can fill it. So get creative! Here are some of the most common and classic ways to add fillers to your clear balls.
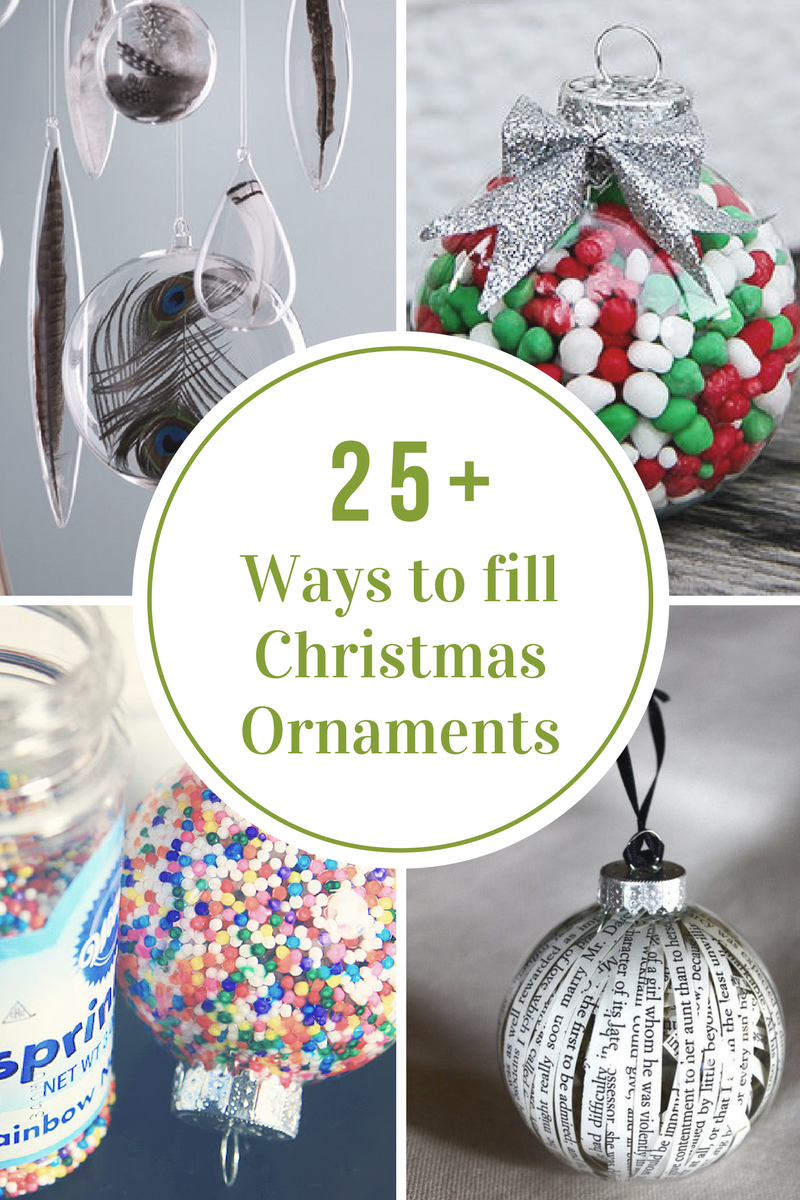
FILLED CLEAR ORNAMENT IDEAS
- sand and small seashells
- time capsule ornament
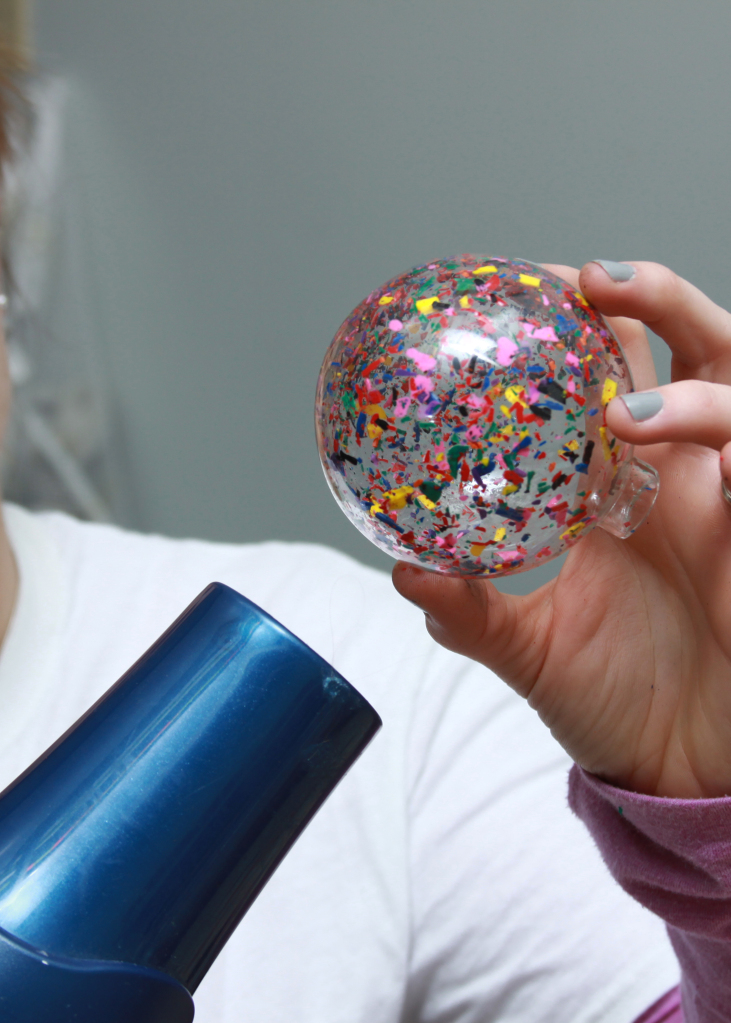
- Melted Crayon Ornament from One Cup at a Time
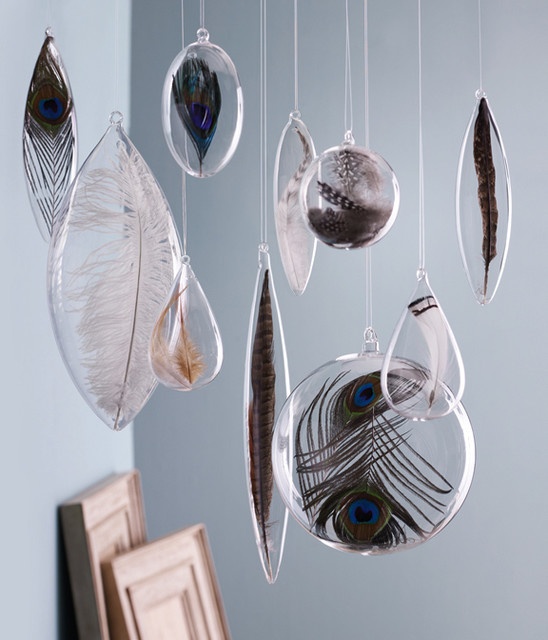
- Feather Filled Ornament from houzz
- Golf Tee filled Ornament from sew many waysSprinkled filled Ornament from Little Gray Fox
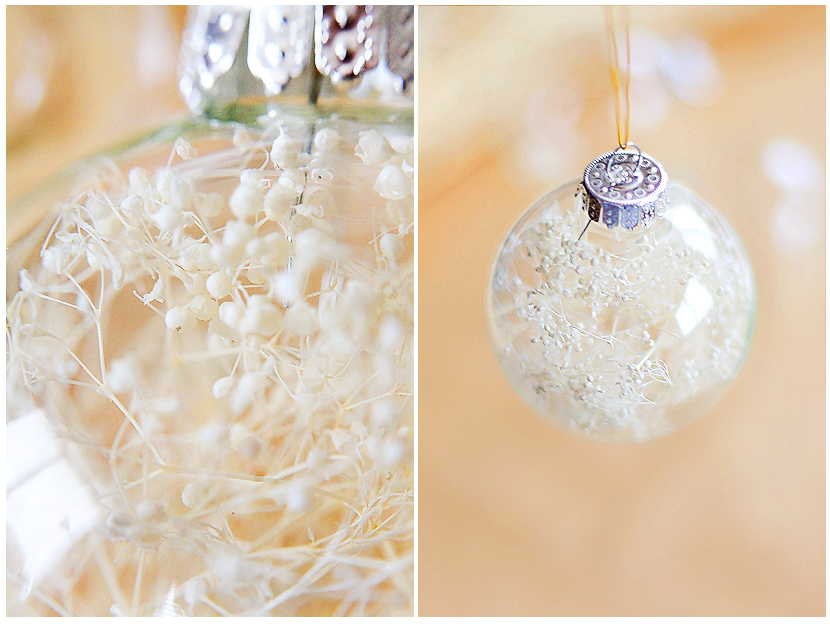
- Baby’s Breath Filled Ornament from Hannah Su
- Sequin filled Ornament from Made by Girl
- Popcorn filled Ornament from The Ornament Girls
- Bath Salt filled Ornament from My Coupon Expert
- Snowflake Confetti filled Ornament from Sew Woodsy
- Candy filled Ornament from Simply Celebrate
- Pom Pom filled Ornament from BRIT + CO
- Pearl Bead filled Ornament from Michaels
- glitter ornamentst from BRIT + CO
- Fake Snow filled Ornament from BRIT + CO
- Vintage Items filled Ornaments from Margo’s Junkin Journal
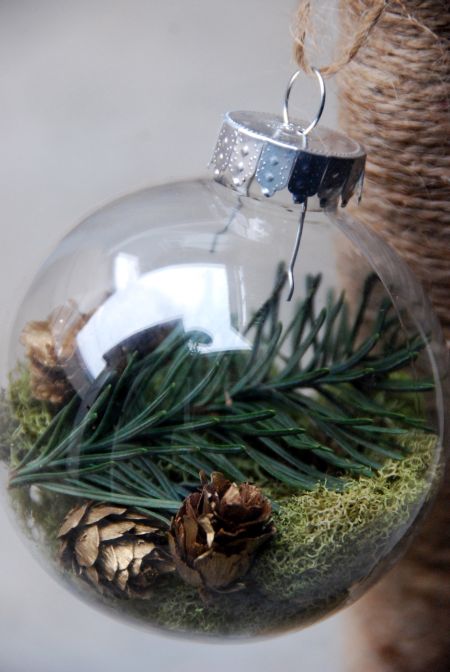
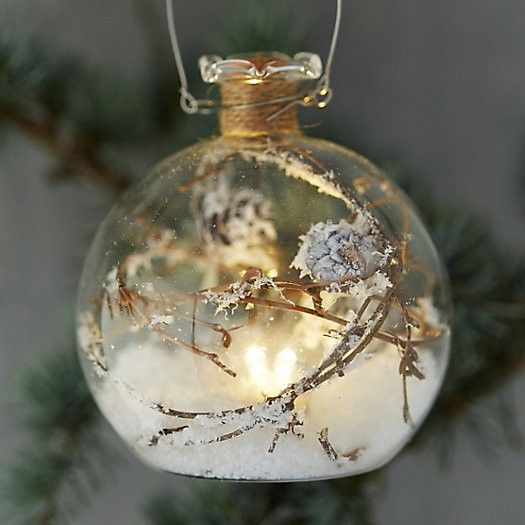
- Forest Filled Ornament from the thrifty crafter
- Book Pages filled Ornament from Brookish
- Hot Cocoa Filled Ornament from Sprinkle Some Fun
- Beads and Wire Filled Ornament from Three Birds Shop
- Mini Christmas Tree Filled Ornament from my paradissi
- Melted Snowman Ornament from It All Started With Paint
- Shredded PaperSanta Claus from The Ornament Girl
- paper filled Reindeer ornaments from Reading Confetti
- Pet Picture Ornament from BRIT + CO
HOW TO FILL CLEAR BALL ORNAMENTS WITH GLITTER
There are a few different ways to make glitter ornaments . The biggest challenge is learning how to add glitter to the inside of your clear Christmas ornaments. Here is the best method I have found. You will need the following materials for this ornament craft:
GLITTER ORNAMENT MATERIALS:
- 2 or 3 inch clear plastic or clear glass ornaments
- plastic syringe
- funnel
- polycrylic (you can also use Mop ‘n’ Glo, Glitter-It!, or Mod Podge) but I think polycrylic works best
- glitter (I like very fine glitter)
- plastic cups
INSTRUCTIONS FOR MAKING GLITTER FILLED ORNAMENTS
- Remove the top cover of the ornament.
- One of the easiest ways to fill your ornament with polycrylic is to use a plastic syringe. Fill your plastic syringe with polycrylic.
- Hold the ornament in one hand and the syringe with the other and gently push a little polycrylicinside the ornament.
- Gently rotate the ornament so the polycrylic can cover the entire inside surface of the ornament ball.
- Add more polycrylic as needed.
- Set the ornament into a small plastic cup so it holds it in place and you can add your glitter.
- Take your funnel and place it into the hold of the ornament.
- Pour the glitter into the ornament…just a small amount at first.
- Gently shake the ornament with your finger over the hole to distribute the glitter to the inside of the clear plastic balls. Add more glitter as needed.
- Let dry.
- Embellish with any else you might want to add or use the glittered ornament as is.
HOW TO PAINT INSIDE OF A CLEAR ORNAMENT
There are a couple different ways you can go about painting the inside of your homemade ornaments. This is the easiest method I have found for painting the inside of the ornament. I have also found that acrylic paint is the cheapest and easiest paint to use. The paint also comes in lots of fun colors!
To prevent the paint from cracking is your ornament you can add a few drops of rubbing alcohol to the inside of the ornament and swirl it around. Let it dry. This seems to help seal the paint and prevent it from cracking. Be sure to use new and well shaken paint as well for best results.
MATERIALS NEEDED TO PAINT ORNAMENT
- Clear glass or plastic ornaments
- Acrylic paint in your favorite colors
- Rubbing alcohol (option)
- Paper towel or plastic cup
INSTRUCTIONS TO PAINT INSIDE AN ORNAMENT
- Remove the top of the ornament.
- Take about 1 TBSP of your acrylic paint and pour it into the plastic ball ornament.
- Rotate the ornament so that the paint covers the inside.
- Take a small plastic cup and set the ornament so that the top is facing down into the cup.
- Any excess paint will dribble out leaving a nice thin layer of paint inside the ornament.
- If there is a lot of excess paint the first time use less on your next ornaments.
- Let dry.
![]()
HOW TO PUT A PHOTO IN A CLEAR ORNAMENT
- 1 photo (relative in the size to the ornament you’ve chosen),
- 1 glass bulb,
- a stick (I like a long paintbrush so I have a soft tip),
- fishing line,
- double-sided tape,
- ribbon
- cardstock (with the date printed or stamped)
Instructions:
- Cut a circle out of your photo that will fit into your ornament. 3 inch photo circle for a 3 inch ornament. (2 inch photo circle for a 2 inch ornament etc.)On the back of the photo place 2-3 strips of double sided tape and set aside.
- Cut another circle the same size out of card stock
- Take a piece of doubled over (in a loop) fishing line long enough to reach the bottom of the ornament and come out the top and tied off.
- Put the loop of the fishing line around the cardstock so the look is at the bottom of the circle and you are holding the two ends of the line in your fingers.
- Stick the two circles together with the one strand between them and the other strand on the back of the card stock circle.
Adding the photo:
- Gently roll the photo into a tube (photo on the outside of the roll), and slide it into the ornament. Leave the ends of the fishing line hanging out fo the ornament.
- Take the end of a paint brush or pencil and stick it in the rolled up photo and gently edge the photo to flatten it out inside the ornament. Use the fishing line to help hold the photo in place.
- If you are having trouble keeping the photo standing upright make your photo a little bigger.
- If you need to remove it you can grab it with a pair of tweezers to pull it out.
- Once you have it in the right spot you can put on the lid by threading the ends of the fishing line through the wire holes in the ornament top. Tie the ends off several times to secure the photo in place.
- Add ribbon or any embellishments to the finished glass ball ornament.
I love this one that you can purchase from here.

HOW TO MAKE CLEAR ORNAMENTS LOOK LIKE MERCURY GLASS
DIY mercury glass ornaments are on my crafting to do list! I am hoping to try it here soon! They are so pretty and make a great addition to your holiday decor! I found a tutorial that looks so amazing. Check out these from My Creative Days: here.
DIY MERCURY GLASS ORNAMENTS
Aren’t these ideas amazing? It might be hard to decide which one to do! Or maybe you have been inspired to create your own unique ideas for filling clear plastic ornaments!
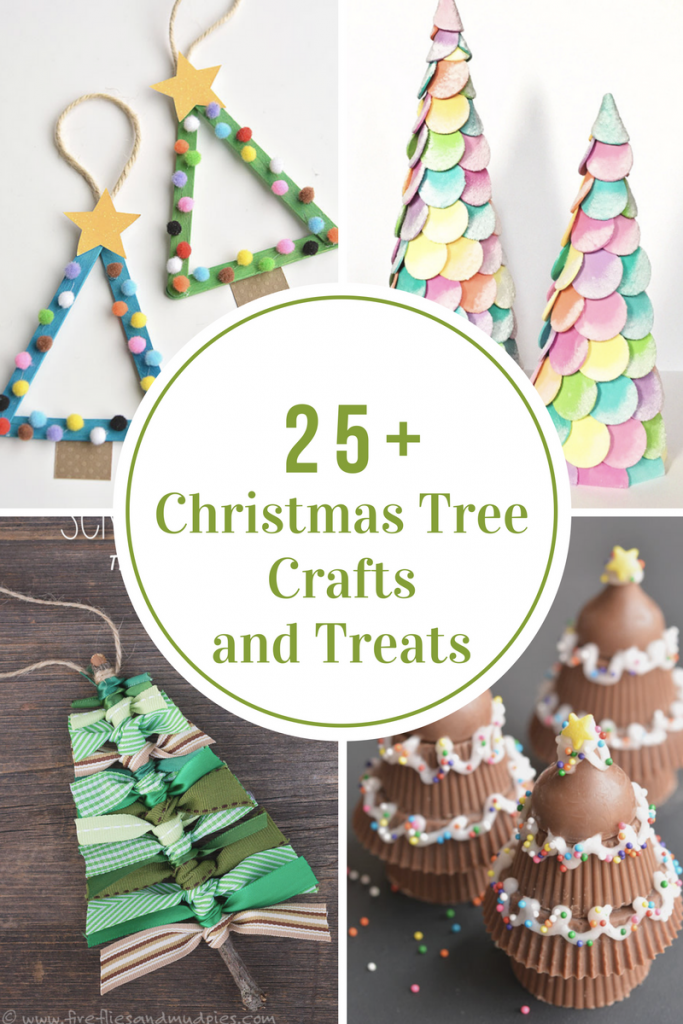
Christmas Tree Crafts and Treats
Reindeer Crafts and Treats
JOIN OUR NEWSLETTER
Would you like more Recipes, DIY, Printables and Organization Ideas?
Subscribing to the newsletter will enable us to periodically send you creative content exclusively for Idea Room subscribers.
*View our Privacy Policy here.


How fun! These are all super cute ornaments! My favorite out of all of them is the forest filled ornament. I didn’t know there were pine cones that small.
I filled an ornament with buttons for my granddaughter and I used buttons from her great grandma’s button box.
The baby’s breath one looks so magical! I love it.
– Charmaine
Thank you for your own labor on this web page. My niece
loves going through research and it’s obvious why.
I learn all regarding the compelling tactic you deliver useful tricks via the blog and as well strongly encourage response from people on the concern and my girl is without question discovering a lot of things.
Take advantage of the remaining portion of the year. You are always carrying out
a good job.
Awesome information it is definitely. My teacher has been awaiting for this
tips.
Step 1: Cut 18 strands of cord 96 inches long each. You’ll also cut one main rope that all the others will be knotted to that’s about 80 inches long. Fold the rope in half and knot it around the main line.
Omia- Thank for for the great tip!